asrar, Author at Cradle Cuteness-Cherishing Babyhood with Style
Author

asrar

Browsing

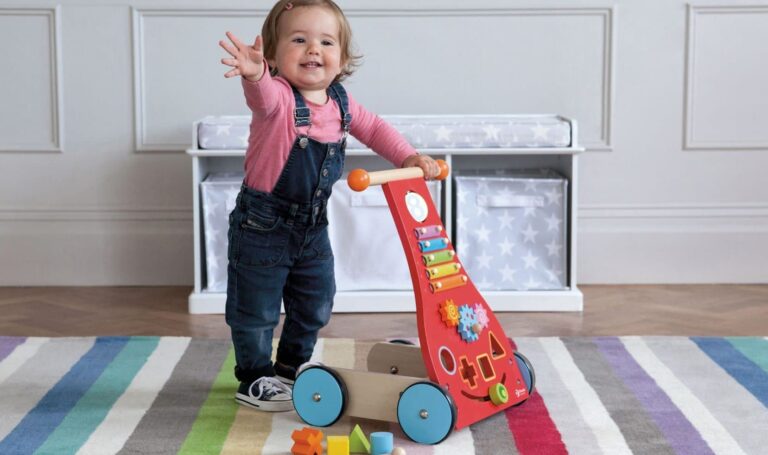
Babies grow incredibly, and watching them transition from crawling to taking their first steps is nothing short of magical. The push Walker for Babies tool has become increasingly popular in helping babies with this milestone. These baby-friendly devices not only support physical development but also provide hours of fun. Let’s dive deep into everything you need to know about push walkers.

 Introduction to Push Walkers

 What Are Push Walkers?

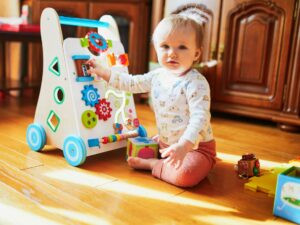
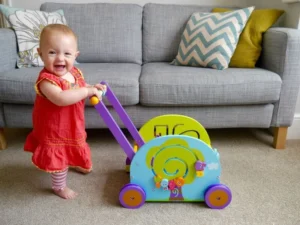
Push walkers are baby mobility aids designed to help little ones learn to walk. Unlike seated walkers, these devices allow babies to stand upright and push the walker forward as they gain confidence in their steps. Push walkers are often equipped with wheels and handles and may feature engaging toys, lights, and sounds to stimulate the baby’s interest.

These walkers are great for promoting natural walking development as they mimic the act of walking instead of restricting a baby’s movement. With designs that vary from basic frames to elaborate interactive models, there’s a push walker for every baby’s needs.

 Why Are Push Walkers Popular?

Push walkers have gained traction among parents for their versatility and developmental benefits. Parents love that these walkers help babies practice walking while also offering activities that keep them entertained. Additionally, many push walkers double as toys, making them a multipurpose investment.

Benefits of Using Push Walkers

 Encouraging Motor Skill Development

Push walkers play a crucial role in enhancing gross motor skills. As babies grip the handle, push the walker, and balance themselves, they develop strength in their legs and arms. The act of pushing also improves hand-eye coordination and spatial awareness, crucial milestones in early development.

 Boosting Confidence and Independence

When babies take their first independent steps using a push walker, it boosts their confidence. They experience a sense of accomplishment, which encourages them to explore more. This newfound independence can spark curiosity, paving the way for more developmental milestones.

 Enhancing Coordination and Balance

Walking is a complex skill requiring coordination between muscles and balance. Push walkers provide the support babies need while learning to coordinate their movements. With consistent practice, they’ll eventually master walking without any aid.
 

Push Walkers for Babies

Types of Push Walkers

 Traditional Push Walkers

These are simple walkers with a sturdy frame, wheels, and a handle for the baby to push. They are ideal for babies who want to focus solely on walking without additional distractions.

 Interactive Push Walkers

Interactive walkers come with built-in toys, sounds, and lights. They’re perfect for keeping babies entertained and engaged, even during breaks from walking practice.

 Multi-functional Push Walkers

These walkers often double as activity centers or ride-on toys. They’re a fantastic choice for parents looking to get more value from a single product.

 Key Features to Consider When Buying a Push Walker

 Safety Features

To ensure your baby’s safety, look for walkers with anti-slip wheels, speed control, and a stable base.

 Build Quality and Material

Opt for push walkers made from non-toxic, durable materials. This ensures they can withstand rough play and last through your baby’s walking phase.

 Weight and Stability

A well-balanced walker with adequate weight prevents tipping and ensures stability as your baby learns to push it.

 Entertainment Features

Toys, buttons, and music can make the push walker more appealing, ensuring your baby enjoys using it.

 Age-Appropriate Push Walkers

 Walkers for Infants

Infants who are just learning to pull themselves up benefit from walkers with a wide, stable base and easy-to-grip handles.

Walkers for Toddlers

Toddlers need walkers with adjustable height and more interactive features to match their growing skills and curiosity.

 How to Introduce Push Walkers to Your Baby

 Timing is Everything

Introducing a push walker at the right time is crucial. Babies typically begin showing readiness between 9 and 12 months when they can pull themselves up to stand. Observing your baby’s cues and readiness is the best way to ensure success.

 Creating a Safe Environment

Before letting your baby use a push walker, ensure the space is free of obstacles like sharp furniture edges or slippery rugs. A clear, open area with a smooth surface is ideal for allowing them to practice walking.

 Encouraging Gradual Usage

Start slow! Initially, let your baby get familiar with the walker by exploring it and playing with any attached toys. Once they’re comfortable, guide them as they push it. Gradual practice sessions will build their confidence.

 Common Concerns About Push Walkers

Are Push Walkers Safe?

Safety concerns often arise regarding any baby gear. Modern push walkers are designed with safety in mind, featuring non-slip wheels and sturdy bases. However, supervision is always recommended.

Do Push Walkers Delay Walking?

Contrary to the myth that walkers delay walking, push walkers encourage babies to practice walking skills naturally. They provide support and stability, helping babies gain confidence.

 Can Push Walkers Be Overused?

Like any baby product, moderation is key. While push walkers are great tools, babies should also have plenty of time for free movement to explore other developmental activities.

 Tips for Maintaining Your Baby’s Push Walker

Regular Cleaning

Babies love to touch, bite, and play with their walkers, so cleaning is essential. Use baby-safe cleaners to wipe down surfaces regularly, ensuring it’s germ-free.

 Inspecting for Wear and Tear

Check the wheels, screws, and other moving parts for any signs of wear or looseness. This prevents accidents and keeps the walker functioning optimally.

 Proper Storage

Store the push walker in a dry, safe place when not in use. This prolongs its life and keeps it in good condition for future siblings or resale.

 Popular Push Walker Brands

 VTech Sit-to-Stand Learning Walker

This walker features an interactive activity panel, lights, and sounds to keep babies entertained while they practice walking.

 Fisher-Price Laugh & Learn Walker

Known for its bright design and engaging features, this walker provides excellent stability and entertainment.

 Hape Wonder Walker

Made from sustainable wood, this eco-friendly walker offers a minimalist design with plenty of support for beginner walkers.

 DIY Push Walker Alternatives

 Repurposing Household Items

For budget-conscious parents, sturdy items like laundry baskets filled with heavy items can work as makeshift push walkers. Just ensure the item is stable and safe.

 Handmade Wooden Walkers

If you’re crafty, creating a custom wooden push walker can be a fulfilling DIY project that meets your baby’s unique needs.

 Using Ride-On Toys

Some ride-on toys double as push walkers, offering dual functionality at a fraction of the cost.

 Push Walker Safety Tips

 Always Supervise

Even with the safest walker, supervision is non-negotiable. Ensure you’re close by while your baby practices.

 Avoid Uneven Surfaces

Uneven or sloped surfaces can make the walker unstable and increase the risk of falls. Stick to smooth, flat areas for playtime.

 Choose the Right Shoes

If your baby wears shoes while using the walker, ensure they’re lightweight and have a good grip to prevent slips.

 Transitioning Beyond Push Walkers
Push Walkers for Babies

 Recognizing Readiness

Most babies outgrow push walkers when they start walking independently. Look for signs like reduced reliance on the walker or more confident steps.

 Encouraging Independent Walking

Once your baby is comfortable without the walker, encourage them to walk by holding your hand or using other supportive methods.

 Building on Developmental Milestones

After mastering walking, focus on other developmental skills like running, climbing, and jumping to further enhance their coordination and strength.

 Conclusion

Push walkers are an excellent tool for helping babies take their first steps, building confidence, and encouraging physical development. With the right walker and a safe, supportive environment, your baby will be striding confidently in no time. Remember to choose age-appropriate designs, monitor usage, and enjoy watching your little one reach this exciting milestone.

FAQs

Q1: At what age should I introduce a push walker to my baby?
Push walkers are generally suitable for babies aged 9–12 months when they can pull themselves up and stand with support.

Q2: Are push walkers better than seated walkers?
Yes, push walkers promote natural walking development by encouraging babies to stand and take steps independently, unlike seated walkers which may restrict movement.

Q3: How do I ensure my baby’s safety while using a push walker?
Always supervise your baby, use the walker on flat surfaces, and choose a model with anti-slip wheels and a sturdy design.

Q4: Can push walkers be used on carpets?
Yes, many push walkers are designed to work on various surfaces, including carpets. Look for models with adjustable wheel resistance.

Q5: Are push walkers worth the investment?
Absolutely! Push walkers provide developmental benefits, entertainment, and support during a crucial growth stage, making them a valuable addition to your baby gear collection.

As a new parent, giving your baby a sponge bath can feel daunting, especially if it’s your first time. But don’t worry—it’s simpler than it seems. Sponge bathing is ideal for newborns and babies with their umbilical stump still attached, as it avoids soaking them in water while keeping them clean and fresh. This guide will walk you through everything you need to know to safely and comfortably give your baby a sponge bath.

Why Do Babies Need Sponge Baths?

Sponge baths are recommended for newborns during the first few weeks of life, particularly while their umbilical cord stump is healing. Submerging your baby in water before the stump falls off can increase the risk of infection. Additionally, sponge baths allow you to clean your baby gently and safely, avoiding unnecessary stress or discomfort.

Benefits of Sponge Baths for Babies:

  • Keeps their skin clean and healthy
  • Prevents rashes and irritation
  • Promotes bonding time between parent and baby
  • Provides a safe alternative for babies not ready for a full bath

Supplies You’ll Need for a Baby Sponge Bath

Preparation is key when it comes to giving your baby a sponge bath. Having all the necessary supplies within arm’s reach makes the process smoother and safer.

Essential Items:

  • A soft, clean towel
  • Baby washcloths or sponges
  • A shallow basin or bowl of lukewarm water (around 98°F or 37°C)
  • Mild, baby-safe soap (optional)
  • Cotton balls for cleaning delicate areas
  • Diaper and fresh baby clothes
  • A waterproof mat or pad for laying your baby down


 baby sponge bath
How to Give a Baby Sponge Bath

Step-by-Step Guide to Giving a Baby Sponge Bath

1. Choose a Safe, Warm Environment

Pick a quiet, draft-free space where you can comfortably bathe your baby. The room should be warm (around 75°F or 24°C) to prevent your baby from feeling cold during the bath. Lay a soft, waterproof mat or towel on a flat surface to create a comfortable spot for your baby.

2. Prepare the Water

Fill a shallow bowl or basin with lukewarm water. Test the temperature with your wrist or elbow—it should feel warm, not hot. Avoid using boiling or cold water, as your baby’s skin is extremely sensitive.

3. Undress Your Baby

Gently undress your baby, leaving the diaper on for now to prevent accidents during the bath. Wrap them in a soft towel to keep them warm, exposing only the area you’re cleaning.

4. Start with the Face

Dip a clean washcloth in the water and wring it out until it’s just damp. Use this to gently wipe your baby’s face, avoiding the eyes and mouth. For the eyes, use a separate cotton ball for each eye and wipe from the inner corner outward.

5. Clean the Body

Unwrap one part of your baby’s body at a time to clean it. Use a damp washcloth to wipe their neck, chest, arms, and legs. Be sure to clean in the folds and creases where dirt and milk residue can build up.

Special Focus Areas During a Sponge Bath

Cleaning the Umbilical Cord Area

The umbilical cord stump should be kept clean and dry. Use a cotton ball or swab dipped in clean water to gently clean around the base of the stump. Pat it dry immediately with a soft cloth.

Cleaning the Diaper Area

Remove the diaper and use a damp washcloth to clean the diaper area. For girls, always wipe front to back to prevent infection. For boys, be gentle around the genitals, and don’t retract the foreskin if they are uncircumcised.

Cleaning the Head and Hair

If your baby has hair, use a small amount of baby-safe shampoo (optional). Wet their hair using the damp washcloth, apply a tiny bit of shampoo, and rinse gently with water.

Drying and Dressing Your Baby

After the bath, pat your baby dry with a soft towel, paying special attention to the creases and folds. Avoid rubbing their skin, as it can irritate. Once they’re scorched, put on a fresh diaper and comfortable clothes.

Safety Tips for Baby Sponge Baths

  • Never leave your baby unattended. Always keep one hand on your baby during the bath.
  • Avoid over-bathing. Two to three sponge baths a week are sufficient to keep your newborn clean without drying out their skin.
  • Check the water temperature. Always ensure the water is lukewarm, not hot.
  • Use gentle, fragrance-free products. Babies’ skin is sensitive, so opt for hypoallergenic and tear-free soaps or shampoos.


 baby sponge bath
How to Give a Baby Sponge Bath

Signs Your Baby Enjoys the Bath

Babies often signal their comfort and enjoyment during a sponge bath by staying calm, smiling, or making soft cooing sounds. If your baby cries or seems uncomfortable, try speaking softly or singing to soothe them.

When to Transition to Regular Baths

Once your baby’s umbilical cord stump has healed (usually around 1–3 weeks), you can transition to bathing them in a baby tub. Always follow similar safety precautions to ensure a comfortable experience for your little one.

FAQs

1. How often should I give my baby a sponge bath?
Two to three times a week is enough unless they get filthy. Over-bathing can dry out their delicate skin.

2. Can I use soap for a newborn’s sponge bath?
It’s unnecessary, but if you choose to, use a mild, baby-safe soap in small amounts.

3. What should I do if my baby hates sponge baths?
Try to make the experience more enjoyable by singing, talking, or offering a soft toy. Keep the bath brief and ensure the room is warm.

4. When can I start giving my baby regular baths?
You can start giving regular baths once the umbilical cord stump falls off and heals completely.

5. What temperature should the water be?
The water should be around 98°F (37°C)—warm but not hot. Always test it on your wrist or elbow.

Introduction: Why Soft Car Toys Are Every Parent’s Favorite

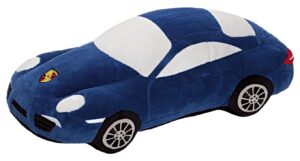
Soft car toys are a fantastic blend of fun, creativity, and safety. Unlike traditional hard plastic toys, these plush car toys are made with soft materials, ensuring kids can play without injury. Ideal for toddlers, babies, and even preschoolers, they stimulate the imagination while prioritizing safety.

Whether shopping for your little one or searching for a perfect gift, soft toys are versatile enough to suit every occasion. In this guide, we’ll explore everything you need to know about these delightful toys, from their features to how they contribute to your child’s development.

1. What Are Soft Car Toys?

Soft car toys are miniature car-shaped toys made from plush, fabric, or other soft materials, designed for young children to play with safely. Unlike their hard plastic counterparts, these toys are lightweight, cuddly, and often feature vibrant colors and textures that capture a child’s attention. They’re perfect for indoor play and are often designed to double as comfort toys.

2. Key Benefits of Soft Car Toy

Safety Features

One of the most compelling reasons parents prefer soft toys is their safety. These toys:

  • Have no sharp edges.
  • Reduce the risk of injury during active play.
  • Are suitable for teething babies, as many are made from non-toxic materials.

Developmental Benefits

Soft car toys also encourage various aspects of child development, including:

  • Motor Skills: Pushing or pulling the toys helps improve hand-eye coordination.
  • Cognitive Growth: Features like numbers, letters, or textures boost early learning.
  • Emotional Comfort: The softness of these toys can provide a calming effect, helping children feel secure.

3. Types of Soft Car Toy

Plush Cars

These are stuffed toy cars made from plush material, often colorful and squishy. They’re ideal for younger toddlers.

Fabric-Based Pull-Along Cars

Featuring a soft body and wheels, these toys are great for kids learning to walk. They can pull them along, adding an interactive element.

Sensory Car Toy

Sensory toys incorporate elements like crinkly fabric, mirrors, or squeaky parts to engage your child’s senses.


soft car toys
Soft Car Toys

4. Best Materials for Soft Car Toy

Plush Fabric

Plush is the most common material, known for its softness and durability.

Organic Cotton

For eco-conscious parents, organic cotton toys are a safe and sustainable choice.

Hypoallergenic Filling

Toys filled with hypoallergenic materials ensure that even kids with allergies can enjoy them.

5. Age Suitability: Are They Right for Your Child?

Soft car toys are generally suitable for children from birth to five years. Babies can use them for sensory stimulation, while toddlers enjoy imaginative play. Always check the age recommendation on the packaging to ensure safety.

6. How Soft Car Toys Enhance Imaginative Play

Soft car toy allow children to create their own scenarios, boosting creativity. For example, a child might pretend they’re driving to the store or racing with friends. This type of play is essential for cognitive development and problem-solving skills.

7. Educational Benefits of Soft Car Toy

Many soft toys come with numbers, letters, or shapes printed on them. These features help teach basic concepts like counting and color recognition, making them an excellent choice for early learning.

8. Top Safety Tips for Soft Car Toy

  • Always check for loose stitching or parts.
  • Ensure the material is labeled as non-toxic.
  • Wash them regularly to maintain hygiene.

9. Top Brands Offering Soft Car Toy

Some renowned brands include:

  • Melissa & Doug: Known for their durable and educational toys.
  • HABA: Offers high-quality fabric-based toys.
  • Lamaze: Specializes in sensory soft toys for infants.

10. How to Choose the Right Soft Car Toy for Your Child

When choosing a soft car toy, consider:

  • Age suitability.
  • Material safety.
  • Features like sound, textures, or lights.
  • Ease of cleaning.

11. Caring for and Cleaning Soft Car Toys

  • Use a gentle detergent to hand wash or machine wash (if specified).
  • Dry them thoroughly to prevent mold or bacteria growth.
  • Store them in a clean, dry place.

12. Soft Toys as Gifts: Why They’re Perfect for Every Occasion

Soft toys are ideal for birthdays, baby showers, and holidays. Their universal appeal and safe design make them a thoughtful gift for any child.

13. DIY Soft Toys: Make Your Own at Home

Feeling crafty? You can create your soft car toys using materials like felt, cotton, and thread. There are plenty of patterns available online to get you started.

14. Frequently Asked Questions About Soft Car Toy

Q1. Are soft car toys safe for newborns?
Yes, as long as they’re labeled suitable for newborns and free of choking hazards.

Q2. Can soft car toys be machine-washed?
Many can, but always check the care label for instructions.

Q3. What’s the best age for introducing soft toys?
Babies as young as six months can start with basic sensory models.

Q4. Do soft car toys help with teething?
Yes, if they’re made from safe, chewable materials.

Q5. Are there eco-friendly options?
Yes, toys made from organic cotton or sustainable materials are available.

15. Conclusion: A Soft and Safe Road to Fun

Soft car toys are more than just playthings—they’re tools for learning, imagination, and comfort. Their safety, combined with their developmental benefits, makes them a must-have for every parent. Whether you buy them or make your own, these toys guarantee hours of safe, creative fun for your child.

Capturing the six-month milestone of your baby is an exciting and joyful experience. At six months, your little one is developing a unique personality, sitting up, giggling, and perhaps even beginning to crawl. A creative photoshoot at home can beautifully document these precious moments. Here are some fantastic ideas to make your baby’s six-month photoshoot special and memorable, all within the comfort of your home.

Why a 6-Month Baby Photoshoot Is Important

The six-month mark is a milestone filled with growth, personality, and delightful expressions. Babies are usually more expressive, can sit up on their own, and are curious about their surroundings. This makes for perfect candid and posed shots that you’ll cherish for years to come.

Benefits of a 6-Month Photoshoot:

  • Captures growth and development milestones.
  • Preserves adorable expressions and unique quirks.
  • Perfect age for sitting poses.
  • Easier to handle than newborn photoshoots.

Let’s dive into some creative, fun, and easy ideas for an at-home baby photoshoot.


6-Month Baby Photoshoot Ideas
Creative 6-Month Baby Photoshoot Ideas at Home

1. Classic White Sheet Background

A timeless and simple idea is to use a classic white sheet as a background. This setup creates a clean, minimalist aesthetic that makes your baby the star of the show.

How to Do It:

  • Lay a white sheet on the floor or drape it over a surface to create a smooth background.
  • Dress your baby in light-colored or pastel outfits to maintain the serene, minimalist feel.
  • Add a small prop, like a teddy bear or a rattle, for your baby to interact with.
  • Use natural light for soft, flattering photos.

This style is ideal for capturing the pure innocence of your baby.

2. Cozy Blanket Nook

Create a warm, cozy setting by using soft, fluffy blankets and pillows. This setup provides comfort and allows you to capture relaxed, candid shots.

Step-by-Step Guide:

  1. Choose a soft, textured blanket as your main base.
  2. Add a few pillows for support and depth.
  3. Dress your baby in a cozy outfit like a onesie or a knit sweater.
  4. Capture your baby lounging, smiling, or playing with a favorite toy.

This idea is perfect for capturing your baby’s natural expressions in a relaxed environment.

3. Fruit Basket Fun

Add a touch of whimsy with a fruit-themed photoshoot. Bright colors and fun props make this a delightful theme.

How to Set Up:

  • Place your baby in a large wicker basket lined with a soft blanket.
  • Surround the basket with colorful fruits like oranges, apples, and bananas.
  • For extra fun, give your baby a piece of (safe-to-hold) fruit to interact with.

This theme creates vibrant, joyful photos and works particularly well if your baby has started teething or tasting solid foods.

4. Baby in a Wooden Crate

A rustic wooden crate can add a vintage touch to your baby photoshoot. It’s simple, versatile, and looks fantastic in photos.

Tips for the Perfect Shot:

  • Line the crate with a soft blanket or faux fur for comfort.
  • Position the crate in an area with plenty of natural light.
  • Place small props like flowers, books, or stuffed animals around the crate.
  • Capture different angles—front, side, and above.

This setup can be customized to match any theme or season.

5. Floral Garden Fantasy

Bring the beauty of nature indoors with a floral-themed photoshoot. This idea is ideal for baby girls but can be customized for boys too.

Step-by-Step Setup:

  1. Lay a soft pastel-colored blanket on the floor.
  2. Arrange artificial or real flowers around your baby.
  3. Dress your baby in a cute floral onesie or a simple white outfit.
  4. Add a flower crown or headband for an adorable touch.

This setup creates soft, ethereal images that are perfect for framing.

6. Storybook Magic

Turn your baby’s photoshoot into a fairytale adventure with a storybook theme. This idea is perfect for capturing the curiosity and wonder of your six-month-old.

How to Create This Setup:

  1. Pick a Favorite Storybook: Choose classic books like Peter Rabbit, Winnie the Pooh, or Where the Wild Things Are.
  2. Set the Scene: Lay open books around your baby to create a literary wonderland.
  3. Dress the Part: Dress your baby in costumes that reflect the book’s theme, such as a bunny onesie or a little bear outfit.
  4. Add Props: Soft toys or themed props related to the story enhance the setup.

Capture shots of your baby reaching for the books or looking curiously at the illustrations.

7. Seasonal Themed Photoshoot

Celebrate the season your baby was born in by incorporating seasonal elements into the photoshoot. Whether it’s summer, winter, spring, or fall, each season offers unique props and color palettes.

Seasonal Ideas:

  • Spring: Fresh flowers, pastel colors, and bunny ears.
  • Summer: Sun hats, sunglasses, and a beach towel backdrop.
  • Fall: Pumpkins, leaves, and cozy knitted outfits.
  • Winter: Snowflakes, faux snow, and a warm blanket.

This idea allows you to create a seasonal memory that reflects the time of year when your baby is hitting this milestone.

8. Bath Time Cutie

A bath-themed photoshoot is adorable, simple, and fun! This setup is perfect if your baby loves water play.

Setting It Up:

  • Use a small baby tub or a large bowl filled with warm water and bubbles.
  • Add rubber duckies, colorful bath toys, or flower petals for a whimsical touch.
  • Position the tub in a well-lit area (preferably near a window).
  • Capture your baby’s expressions as they splash and play.

This theme is great for natural smiles and candid moments.

9. Ball Pit Fun

A DIY ball pit can add color and excitement to your baby’s photoshoot. It’s an engaging setup that captures the playful side of your six-month-old.

How to Create a DIY Ball Pit:

  1. Use a shallow box, inflatable pool, or baby playpen.
  2. Fill it with colorful plastic balls (ensure they’re baby-safe).
  3. Let your baby sit or lie in the ball pit.
  4. Capture shots of them reaching for balls, laughing, or simply exploring.

This idea is vibrant, dynamic, and perfect for showcasing your baby’s joy.


6-Month Baby Photoshoot Ideas
Creative 6-Month Baby Photoshoot Ideas at Home

10. Peek-a-Boo Curtain Play

Use curtains, scarves, or sheer fabric to create an interactive peek-a-boo game that makes for priceless expressions and giggles.

Steps for This Setup:

  1. Drape a lightweight curtain or scarf in a doorway or against a wall.
  2. Play peek-a-boo with your baby from behind the fabric.
  3. Capture their surprised, joyful, or curious expressions.
  4. Ensure natural light is coming through for a soft, diffused glow.

This simple idea captures the playful bond between you and your baby.

11. Rainbow-Themed Photoshoot

Brighten up your photos with a rainbow theme, celebrating the cheerful nature of your six-month-old.

How to Create a Rainbow Setup:

  • Backdrop: Use colorful fabric or a rainbow tapestry.
  • Props: Include rainbow-colored toys, pillows, or blankets.
  • Outfit: Dress your baby in a rainbow onesie or solid bright colors.
  • Pose: Let your baby lie down or sit up surrounded by colors.

This vibrant theme adds energy and joy to your photos.

12. Milestone Chalkboard

Create a milestone chalkboard to document your baby’s achievements and growth stats.

How to Do It:

  1. Use a small chalkboard or a printable milestone template.
  2. Write down your baby’s weight, height, favorite toys, and new skills.
  3. Position your baby beside or in front of the chalkboard.
  4. Capture shots with your baby looking curious or playful.

This setup is informative and makes for a memorable keepsake.

13. Teddy Bear Picnic

A classic and heartwarming theme is a teddy bear picnic. This setup works indoors or in your backyard.

Steps to Create the Picnic:

  1. Blanket Spread: Use a gingham or picnic blanket.
  2. Teddy Bears: Arrange teddy bears around your baby.
  3. Picnic Basket: Include a small basket with toy food or real snacks.
  4. Outfit: Dress your baby in overalls or a cute dress.

Capture your baby interacting with the teddy bears, creating a scene full of imagination.

14. Themed Outfit Parade

Dress your baby in different outfits that reflect various themes for a mini fashion show.

Ideas for Outfits:

  • Animal Onesies: Lions, tigers, or pandas.
  • Character Costumes: Superheroes, fairies, or princes/princesses.
  • Cultural Attire: Traditional outfits representing your heritage.

Switch between outfits and capture different expressions for a delightful photo series.

15. Simple Black-and-White Portraits

Sometimes, less is more. Black-and-white photography captures raw emotion and simplicity.

How to Capture Black-and-White Portraits:

  • Use a plain, uncluttered background.
  • Focus on close-up shots to highlight your baby’s eyes, smile, or hands.
  • Experiment with lighting and shadows for depth.

These timeless portraits focus on the details and emotions of your baby’s six-month milestone.

Tips for a Successful 6-Month Baby Photoshoot

  1. Timing is Everything: Schedule the shoot after a nap and feed for a happy baby.
  2. Natural Light: Use soft, natural light near windows for the best results.
  3. Patience is Key: Take breaks if your baby gets fussy.
  4. Safety First: Ensure all props are safe and baby-friendly.
  5. Capture Candid Moments: Don’t focus solely on poses—capture spontaneous smiles and giggles.

Conclusion

A six-month baby photoshoot at home is a wonderful way to celebrate your little one’s milestones. With these creative and simple ideas, you can capture memories you’ll cherish forever. Whether you opt for cozy setups, playful themes, or classic portraits, each idea allows you to highlight your baby’s unique personality.

FAQs

1. What is the best time of day for a baby photoshoot?

The best time is after your baby has had a good nap and feeding, typically in the morning or early afternoon.

2. What props should I use for a six-month baby photoshoot?

Safe props like soft toys, blankets, flowers, and simple backdrops work best.

3. Can I use my smartphone for the photoshoot?

Yes! Most modern smartphones have excellent cameras. Use portrait mode and natural light for professional-looking results.

4. How can I keep my baby entertained during the photoshoot?

Use toys, play peek-a-boo, or have a family member engage your baby to capture smiles and laughter.

5. How do I ensure my baby’s safety during the photoshoot?

Always supervise your baby closely, use soft props, and ensure they are supported during sitting poses.

Introduction to Mixed Baby Girl Names

The beauty of diversity is captured in the names we give our children. Mixed baby girl names reflect the harmony of multiple cultures and are a wonderful way to honor different heritages. These names are not just beautiful but also rich in meaning, history, and personal significance. Choosing a mixed baby name can be both exciting and meaningful, especially in today’s increasingly multicultural world.

Why Choose a Mixed Baby Girl Name?

Choosing a mixed baby girl’s name offers more than just a unique sound; it provides a way to celebrate your family’s rich and diverse background. These names often:

  • Honor Both Cultures: Reflect the cultural identities of both parents.
  • Promote Inclusivity: Embrace a broader worldview and appreciation for diversity.
  • Carry Deep Meanings: Many mixed names combine powerful meanings from different languages.
  • Stand Out: Provide a name that’s unique yet beautiful.

In a world where multiculturalism is becoming the norm, giving your child a name that blends cultures can be a wonderful way to foster connection and pride in their heritage.

Tips for Choosing the Perfect Mixed Baby Name

Finding the ideal name that blends multiple cultures can be challenging. Here are a few tips to help you choose the perfect mixed baby girl name:

  1. Consider Pronunciation: Ensure the name is easy to pronounce in both cultures.
  2. Combine Heritage: Look for names that have roots in both family backgrounds.
  3. Meaning Matters: Choose names with meaningful interpretations in each language.
  4. Sound Harmony: Ensure the name flows well with your surname.
  5. Check Initials: Make sure the initials don’t spell out something unintended.

Taking these tips into account can help you choose a name that honors your family’s diversity while being beautiful and meaningful.


Mixed Baby Girl Names

Unique Mixed Baby Girl Names by Culture

European & Asian Blends

  1. Amara Mei – Amara (Greek for “eternal”) + Mei (Chinese for “beautiful”).
  2. Sofia Hana – Sofia (Greek for “wisdom”) + Hana (Japanese for “flower”).
  3. Elise Lin – Elise (French for “pledged to God”) + Lin (Chinese for “forest”).

African & Western Blends

  1. Zara Grace – Zara (Swahili for “princess”) + Grace (Latin for “favor”).
  2. Nia Faith – Nia (Swahili for “purpose”) + Faith (English for “trust”).
  3. Amani Rose – Amani (Arabic for “peace”) + Rose (Latin for “flower”).

Latin American & European Blends

  1. Mariana Belle – Mariana (Spanish for “grace”) + Belle (French for “beautiful”).
  2. Lucia Mae – Lucia (Spanish for “light”) + Mae (English for “pearl”).
  3. Camila Joy – Camila (Spanish for “attendant”) + Joy (English for “happiness”).

Trending Mixed Baby Girl Names in 2024

Mixed baby girl names are becoming more popular as society embraces diversity. Some of the hottest trends in 2024 include:

  1. Aria Sakura – Aria (Italian for “melody”) + Sakura (Japanese for “cherry blossom”).
  2. Mila Anaya – Mila (Slavic for “gracious”) + Anaya (Hebrew for “God answers”).
  3. Nova Ayaka – Nova (Latin for “new”) + Ayaka (Japanese for “colorful flower”).

These names are modern and elegant, and celebrate the beauty of blended cultures.

Celebrity-Inspired Mixed Baby Girl Names

Many celebrities have chosen mixed baby names for their children. Here are a few celebrity-inspired options:

  1. Harper Seven – Inspired by Victoria and David Beckham.
  2. North West – Inspired by Kim Kardashian and Kanye West.
  3. Blue Ivy – Inspired by Beyoncé and Jay-Z.

These names reflect creativity, uniqueness, and cultural blending.

Modern and Unique Mixed Baby Girl Names

Looking for something modern and trendy? Here are a few stylish mixed names:

  1. Zara Elise
  2. Lila Ayumi
  3. Kiera Mei

These names are contemporary yet timeless.

Classic Mixed Baby Girl Names

Do you prefer something more traditional? Here are classic options:

  1. Maria Grace
  2. Anna Sofia
  3. Elena Joy

These names have stood the test of time and remain favorites across generations.

Conclusion

Choosing the perfect mixed baby name is an exciting way to celebrate the beauty of diversity. These names can honor family heritage, offer meaningful symbolism, and give your child a unique identity. By considering cultural backgrounds, meanings, and trends, you can find a beautiful and significant name.

FAQs

1. What are some popular mixed baby girl names for 2024?
Trending names include Aria Sakura, Mila Anaya, and Nova Ayaka.

2. How do I choose a mixed baby name that honors both cultures?
Consider names that combine heritage, and meanings, and are easy to pronounce in both languages.

3. What are some celebrity-inspired mixed baby names?
Names like Harper Seven, North West, and Blue Ivy are great examples.

4. Are there any one-syllable mixed baby names?
Yes! Options include Lin, Mei, and Joy.

5. Can mixed baby girl names still be traditional?
Absolutely! Names like Maria Grace and Anna Sofia are classic yet reflect diverse backgrounds.

Furniture corner protectors are essential tools for enhancing home safety, especially if you have children or pets. Whether you’re a parent looking to child-proof your home or someone aiming to prevent furniture damage, corner protectors are a simple yet effective solution. This guide explores everything you need about furniture corner protectors, including their benefits, types, installation tips, and buying advice.

1. What Are Furniture Corner Protectors?

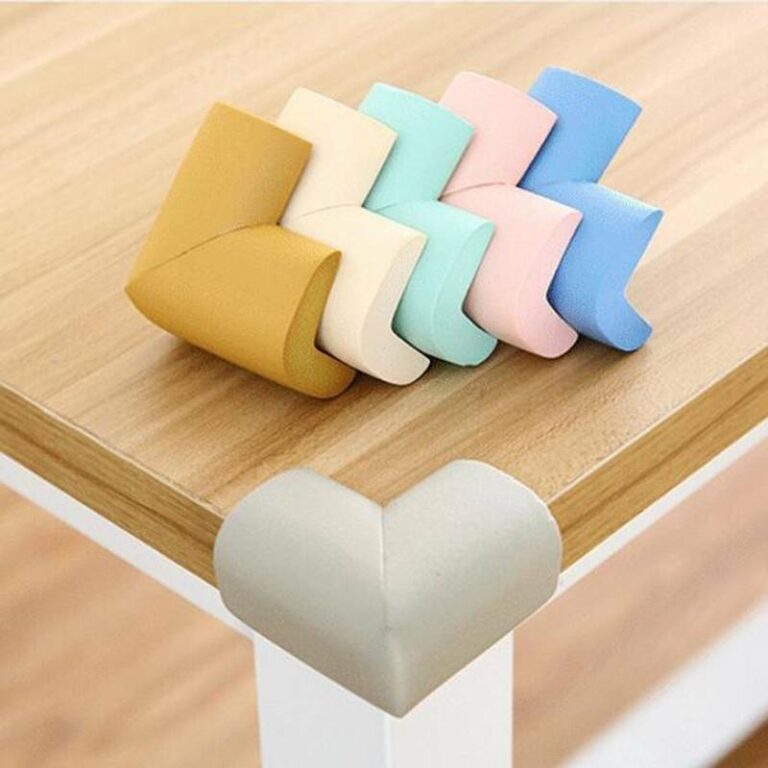
Furniture corner protectors are safety devices designed to cover the sharp or pointed edges of tables, chairs, cabinets, and other furniture pieces. They are typically made from foam, silicone, plastic, or metal materials. These protectors serve two primary purposes: to prevent injuries caused by sharp corners and to protect furniture from damage. They are easy to install, affordable, and available in various shapes and colors to suit different furniture styles.

2. Why Do You Need Furniture Corner Protectors?

Furniture corner protectors are more than just safety accessories. Here are some compelling reasons why you need them:

  • Child Safety: Kids are prone to accidents, and sharp furniture edges pose a significant risk. Corner protectors reduce the chances of head injuries, bruises, and cuts.
  • Pet Safety: If you have active pets, corner protectors can prevent them from getting hurt while playing around furniture.
  • Prevent Furniture Damage: Corner protectors can minimize wear and tear, keeping your furniture edges intact and free from chips or scratches.
  • Office Safety: Corner guards in workspaces can help maintain a safer environment and reduce potential liability from accidents.

3. Types of Furniture Corner Protectors

Corner protectors come in various types, each designed for specific needs. Here are the most common ones:

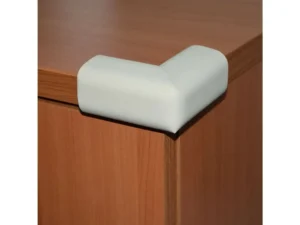
3.1. Soft Foam Corner Protectors

  • Material: Soft, high-density foam
  • Best For: Homes with babies or toddlers
  • Features: Thick padding, absorbs impact, easy to install
  • Pros: Affordable, available in multiple colors
  • Cons: May wear out over time

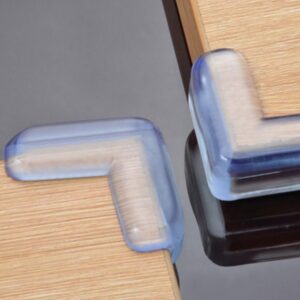
3.2. Silicone Corner Protectors

  • Material: Flexible silicone
  • Best For: Aesthetic-conscious homes
  • Features: Transparent, durable, shock-absorbent
  • Pros: Blends with furniture, long-lasting
  • Cons: Slightly more expensive than foam

3.3. Plastic Corner Guards

  • Material: Hard plastic
  • Best For: High-traffic areas, offices
  • Features: Rigid protection, available in various colors
  • Pros: Durable, resists wear and tear
  • Cons: Not as soft as foam or silicone

3.4. Metal Corner Protectors

  • Material: Stainless steel or aluminum
  • Best For: Protecting furniture from damage
  • Features: Sleek design, heavy-duty protection
  • Pros: Ideal for industrial or vintage furniture
  • Cons: Not suitable for child safety

3.5. Adhesive vs. Non-Adhesive Options

  • Adhesive: Stick securely to furniture; easy to install but may leave residue.
  • Non-Adhesive: Slide onto furniture corners; reusable and leave no residue.


Furniture corner protectors

4. How to Choose the Best Furniture Corner Protectors

Choosing the right corner protectors depends on several factors:

  • Purpose: Child safety, pet safety, or furniture preservation
  • Material: Foam, silicone, plastic, or metal based on your needs
  • Aesthetic: Transparent or color-matched to fit your furniture style
  • Durability: High-traffic areas need more durable options like plastic or metal
  • Ease of Installation: Adhesive protectors for convenience; non-adhesive for flexibility

5. How to Install Furniture Corner Protectors

Installing furniture corner protectors is simple and quick. Here’s a step-by-step guide:

  1. Clean the Surface: Wipe the corner with a damp cloth to remove dust and oil.
  2. Measure and Fit: Check the protector’s size and fit it to the furniture corner.
  3. Peel Adhesive Backing: If adhesive, remove the backing to expose the sticky surface.
  4. Apply Firmly: Press the protector onto the corner and hold for 30 seconds.
  5. Check for Stability: Ensure it’s securely attached before use.

For non-adhesive protectors, simply slide the protector onto the corner and adjust as needed.

6. Top 5 Furniture Corner Protectors on the Market

Finding the right corner protectors can be overwhelming with so many options available. Here are the top 5 highly recommended corner protectors that cater to different needs:

1. Roving Cove Baby-Proofing Corner Guards

  • Material: High-density foam
  • Best For: Child safety
  • Features: BPA-free, fire-resistant, and thick cushioning
  • Pros: Easy to install and available in multiple colors
  • Cons: Adhesive may leave residue if removed forcefully

2. CalMyotis Clear Silicone Corner Protectors

  • Material: Transparent silicone
  • Best For Homes where aesthetics matter
  • Features: Soft, flexible, and blends seamlessly with furniture
  • Pros: Durable and visually unobtrusive
  • Cons: Slightly pricier than foam options

3. Sure Basics Soft Corner Guards

  • Material: Soft foam
  • Best For: Budget-friendly baby-proofing
  • Features: Easy peel-and-stick application
  • Pros: Affordable and effective
  • Cons: May wear out quickly with heavy use

4. Bebe Earth Edge and Corner Protector Set

  • Material: Foam with reinforced edges
  • Best For: Comprehensive safety needs
  • Features: Includes both edge and corner protectors
  • Pros: Complete safety solution for larger furniture pieces
  • Cons: Bulkier appearance

5. Uxcell Metal Corner Guards

  • Material: Stainless steel
  • Best For: Industrial and vintage-style furniture
  • Features: Heavy-duty protection against damage
  • Pros: Durable and stylish for non-childproof settings
  • Cons: Not suitable for child safety purposes

7. Safety Tips for Using Furniture Corner Protectors

To maximize the safety and effectiveness of your corner protectors, follow these essential tips:

  1. Check Regularly: Ensure the corner protectors are securely attached and not peeling off.
  2. Replace Worn-Out Protectors: Over time, foam and silicone protectors may wear out; replace them promptly.
  3. Clean Surfaces Before Installation: Dirt and dust can weaken adhesive strength.
  4. Supervise Kids and Pets: While corner protectors reduce injury risk, supervision is still necessary.
  5. Choose Non-Toxic Materials: Opt for BPA-free, phthalate-free options for child safety.

8. DIY Furniture Corner Protectors

If you’re in a pinch or enjoy DIY projects, you can create your corner protectors with household items. Here’s how:

Materials Needed

  • Old foam or sponge
  • Duct tape or masking tape
  • Scissors

Steps to Make DIY Corner Protectors

  1. Cut the Foam: Slice the foam into small square pieces, large enough to cover the corners.
  2. Shape the Corners: Fold the foam around the sharp corner.
  3. Secure with Tape: Use duct tape to hold the foam in place. Wrap the tape securely around the corner for stability.

Pros of DIY Protectors:

  • Cost-effective
  • Immediate solution

Cons of DIY Protectors:

  • Less durable
  • May not look as neat or professional

9. Benefits of Using Furniture Corner Protectors

Using furniture corner protectors offers a wide range of benefits:

  1. Prevents Injuries: Reduces the risk of head injuries, cuts, and bruises, especially for children and pets.
  2. Protects Furniture: Prevents damage to furniture edges, preserving their appearance.
  3. Peace of Mind: Knowing your home is safer brings comfort and reassurance.
  4. Easy Installation: No special tools are required, making it a hassle-free solution.
  5. Affordable Safety: Corner protectors are a budget-friendly way to child-proof your home.

10. Common Myths About Corner Protectors

Let’s debunk some of the common misconceptions about corner protectors:

  1. Myth: They Damage Furniture
    • Reality: Quality corner protectors are designed to be removed without damaging furniture surfaces.
  2. Myth: Only for Families with Kids
    • Reality: Corner protectors also benefit pet owners, offices, and anyone looking to protect furniture.
  3. Myth: They’re Unattractive
    • Reality: Modern silicone and clear protectors blend seamlessly with furniture designs.
  4. Myth: Installation Is Complicated
    • Reality: Most protectors use simple peel-and-stick adhesive or slip-on mechanisms.

11. Where to Buy Corner Protectors

Corner protectors are widely available both online and in stores. Here are some popular purchasing options:

  • Online Marketplaces:
    • Amazon
    • eBay
    • Walmart
  • Specialty Baby Stores:
    • Buy Buy Baby
    • Babylist
  • Home Improvement Stores:
    • Home Depot
    • Lowe’s
  • Office Supply Stores:
    • Staples
    • Office Depot

12. Maintenance and Care for Corner Protectors

To keep your corner protectors in top condition:

  1. Regular Cleaning: Wipe them down with a damp cloth to remove dust and grime.
  2. Check Adhesive: Ensure the adhesive remains strong; replace if peeling occurs.
  3. Avoid Harsh Chemicals: Use mild soap and water to prevent material damage.
  4. Replace When Needed: If protectors show signs of wear, replace them to maintain safety.


Furniture corner protectors
Furniture Corner Protectors

13. Furniture Corner Protectors for Different Settings

Different environments may require specific types of corner protectors:

  • Home Use: Soft foam or silicone for child safety.
  • Offices: Durable plastic corner guards for high-traffic areas.
  • Schools and Daycares: Thick foam protectors for maximum safety.
  • Restaurants: Clear silicone for aesthetics and safety.

14. Eco-Friendly Corner Protectors

Environmentally conscious consumers can opt for eco-friendly corner protectors. These are typically:

  • Made from Recyclable Materials: Silicone and certain plastics are recyclable.
  • Non-toxic: Free from harmful chemicals like BPA and phthalates.
  • Biodegradable Options: Some foam protectors are designed to break down naturally.

15. Conclusion

Furniture corner protectors are simple, effective, and essential tools for ensuring safety at home and beyond. Whether you’re a parent looking to baby-proof your home, an office manager enhancing workplace safety, or someone aiming to protect valuable furniture, there are options to meet your needs. With various types, materials, and installation methods available, corner protectors are a small investment that provides peace of mind and protection.

FAQs

1. Are corner protectors easy to remove?

Yes, most furniture corner protectors are designed to be easily removed without damaging the furniture.

2. How do I clean silicone corner protectors?

Use a damp cloth with mild soap to wipe them clean.

3. Can I reuse corner protectors?

Some non-adhesive protectors can be reused, while adhesive types may lose stickiness after removal.

4. Are metal corner protectors safe for children?

No, metal corner protectors are better suited for furniture protection, not child safety.

5. Do corner protectors leave a residue?

High-quality adhesive corner protectors generally do not leave a residue if removed carefully.

Why Limiting Screen Time for Babies Is Crucial

In the digital age, screens are everywhere. While technology offers convenience and entertainment, it poses significant risks for young children, particularly babies under two years old. Limiting screen time for babies is essential for their brain development, cognitive skills, and social growth. The first years of life are crucial for sensory experiences and physical interaction, which cannot be replicated through screens. Excessive screen time can impede their ability to explore the real world, form attachments, and develop essential motor skills. Discover effective ways to avoid screen time for babies.

Additionally, too much screen exposure has been linked to delayed speech, sleep issues, and behavioral challenges. Babies learn best through real-life interactions—hearing voices, seeing faces, touching objects, and experiencing various textures and sounds. By limiting screen time, you create an environment that promotes healthy growth, curiosity, and bonding.

Understanding the Effects of Screen Time on Babies

Cognitive Development Risks

Screen time can interfere with babies’ cognitive development. The American Academy of Pediatrics (AAP) states that babies under 18 months should avoid screen use (except for video chatting). Passive screen time doesn’t offer the interactive and sensory stimulation babies need to build neural connections.

Speech Delays

Studies have shown a link between screen time and delayed speech development. Babies need to hear spoken language in context, engage with caregivers, and practice vocalization to develop their speech skills.

Attention Span Issues

Babies exposed to screens for extended periods may struggle with attention control. The fast-paced visuals and sounds on screens can overstimulate their senses, making it harder to focus on real-world tasks.

Sleep Disturbances

Blue light from screens can disrupt babies’ sleep patterns. Screens before bedtime interfere with melatonin production, making it harder for babies to fall asleep and stay asleep.


Avoid Screen Time for Babies
How to Avoid Screen Time for Babies

Recommended Screen Time Guidelines for Babies

AAP Guidelines on Screen Time

  • Under 18 Months: Avoid screen time, except for video chatting.
  • 18-24 Months: Limited high-quality educational content with parental interaction.
  • 2-5 Years: Limit screen time to one hour per day, focusing on educational programming.

Why These Guidelines Matter

These guidelines help ensure that babies receive the proper stimulation needed for growth and development. By following them, you minimize risks and maximize positive learning experiences.

Practical Strategies to Avoid Screen Time for Babies

4.1 Create a Screen-Free Routine

Developing a routine that doesn’t rely on screens sets clear expectations. Designate specific activities for morning, afternoon, and evening, such as tummy time, reading, and interactive play. Babies thrive on predictable schedules, and incorporating screen-free activities makes it easier to avoid screens.

4.2 Prioritize Play-Based Learning

Babies learn through play. Interactive, hands-on activities like stacking blocks, playing with sensory bins, or exploring textured toys engage their senses and build cognitive skills. Play-based learning keeps babies occupied and reduces the temptation to use screens.

4.3 Encourage Outdoor Activities

Fresh air and natural settings provide sensory-rich experiences. Activities like crawling on the grass, observing trees, and feeling different textures (sand, leaves, water) stimulate babies’ brains. Outdoor play also helps develop gross motor skills and strengthens their immune systems.

Screen-Free Activities for Babies

5.1 Sensory Play

Sensory play is a fantastic way to engage babies without screens. Activities like playing with water, sand, or homemade sensory bottles stimulate touch, sight, and sound. Sensory play supports brain development and helps babies learn about their environment.

Examples of Sensory Play:

  • Water play with cups and spoons
  • Textured mats (rough, smooth, bumpy)
  • Sensory bags with colorful gels and beads

5.2 Reading and Storytelling

Reading to your baby boosts language development and creates a bond between you. Choose books with bright colors, textures, and simple stories. Point to pictures and describe them to keep your baby engaged. Storytelling doesn’t require books—makeup stories based on daily events or their favorite toys.

Role of Parents in Limiting Screen Time

Parents are role models when it comes to screen habits. If your baby sees you frequently using screens, they’re likely to want to mimic that behavior. Here are some strategies for setting a good example:

  1. Model Screen-Free Behavior: Engage in screen-free activities while your baby is present.
  2. Set Limits for Yourself: Schedule specific times to check your devices.
  3. Engage in Face-to-Face Interaction: Talk, sing and play with your baby regularly.

Incorporating Technology-Free Family Time

Making screen-free family time a priority benefits everyone. Plan regular activities that involve the whole family, such as:

  • Board Game Nights
  • Family Walks
  • Picnics in the Park

These activities create meaningful bonds and teach your baby the value of real-world interactions.

Setting Up a Screen-Free Environment at Home

Creating a screen-free environment at home helps reduce the temptation for both you and your baby to rely on screens. Here are some effective strategies:

Designate Screen-Free Zones

Identify specific areas in your home where screens are not allowed. The nursery, dining room, and play areas are great places to enforce this rule. By doing so, you encourage interactive and engaging activities without digital distractions.

Organize Play Areas with Interactive Toys

Provide a variety of toys that encourage imaginative play and motor skill development. Examples include:

  • Stacking Blocks
  • Puzzles
  • Soft Toys
  • Musical Instruments (like a baby-safe xylophone)

Rotate these toys frequently to keep your baby curious and entertained.

Create a Cozy Reading Nook

Set up a comfortable space with soft cushions and a collection of age-appropriate books. This dedicated area will encourage your baby to enjoy books and storytelling instead of screens.

Minimize Background TV Noise

Even if no one is actively watching, having the TV on in the background can negatively affect your baby’s attention and learning. Turn off the TV when not in use to create a calm and focused environment.

Tips for Managing Screen Time in Public Places

It’s challenging to avoid screens when you’re out and about. Many public spaces, like restaurants and waiting rooms, rely on screens for entertainment. Here are some strategies to help you navigate these situations:

Pack a ‘Screen-Free’ Bag

Carry a small bag with toys, books, and snacks to keep your baby entertained. Items like soft toys, teething rings, and board books can keep them occupied without the need for screens.

Engage with Your Baby Actively

Talk to your baby about their surroundings. Point out different objects, colors, and people. Simple games like peek-a-boo or “I Spy” help keep them engaged.

Plan Around Nap Times

If possible, schedule outings during your baby’s nap times. A well-rested baby is less likely to become fussy and need a screen for distraction.

Choose Screen-Free Venues

Opt for places that encourage play and interaction, such as parks, play centers, or libraries.


Avoid Screen Time for Babies
How to Avoid Screen Time for Babies

Balancing Screen Use for Parents and Babies

Managing your own screen time sets the right example for your baby. Here are some ways to balance your digital use:

Schedule Screen Time for Yourself

Set specific times to check emails, social media, or watch videos. Avoid using screens during family activities, meals, and playtime.

Practice Mindful Use

Be conscious of why and how you use screens. Limit scrolling for entertainment and focus on purposeful use, like reading an article or connecting with family.

Use Parental Control Tools

Consider using apps or features that help limit your own screen time. Many smartphones now offer features that monitor and restrict usage.

Communicate Your Limits

If you’re working from home, let others know your screen-free times so they can respect your boundaries.

When Screen Time Is Inevitable: Healthy Ways to Manage It

Sometimes, screen time can’t be avoided. Here’s how to manage it responsibly:

Choose Educational Content

Opt for high-quality educational programs designed for babies. Shows like Sesame Street and apps that promote learning can be more beneficial than general entertainment.

Watch Together

When your baby watches something, sit with them and interact with the content. Point out characters, ask questions, and explain what’s happening. This makes screen time more engaging and less passive.

Limit Viewing Time

Set clear limits on how long screens are used. Stick to the AAP recommendation of no more than one hour per day for children aged 2-5 and avoid screens entirely for younger babies.

Avoid Screens Before Bedtime

Screen exposure before bedtime can disrupt sleep. Turn off all devices at least an hour before your baby’s bedtime routine.

Signs Your Baby Might Be Exposed to Too Much Screen Time

It’s important to recognize the signs that your baby may be spending too much time in front of screens. Some indicators include:

  1. Speech Delays: Difficulty forming words or sentences.
  2. Attention Issues: Short attention span or difficulty focusing on tasks.
  3. Sleep Problems: Trouble falling or staying asleep.
  4. Reduced Social Interaction: Lack of interest in playing with others or interacting with caregivers.
  5. Behavioral Changes: Increased irritability or hyperactivity.

If you notice these signs, it may be time to reevaluate and reduce screen exposure.

How to Stay Consistent with Screen Time Rules

Consistency is key when it comes to limiting screen time for babies. Here’s how to stay on track:

  1. Set Clear Rules: Establish and communicate screen-time rules with everyone in the household.
  2. Create a Routine: Structure your day with engaging, screen-free activities.
  3. Track Progress: Keep a log of screen time to ensure you’re meeting your goals.
  4. Stay Flexible: Life happens! If you slip up, simply get back on track the next day.
  5. Reward Screen-Free Time: Celebrate milestones like a week of reduced screen time with fun activities or family outings.

Common Myths About Screen Time and Babies

Myth 1: Screens Are Harmless for Babies

Reality: Excessive screen time can hinder cognitive and language development.

Myth 2: Educational Apps Are Always Beneficial

Reality: Babies learn best through real-world interactions, not screens.

Myth 3: Screen Time Helps Babies Relax

Reality: Screens can overstimulate babies and disrupt sleep.

Conclusion

Avoiding screen time for babies is one of the most beneficial steps you can take for their development. By understanding the risks, setting clear boundaries, and offering screen-free activities, you can nurture your baby’s cognitive, emotional, and physical growth. Focus on interactive play, outdoor adventures, and family engagement to create a healthy, enriching environment that fosters lifelong learning.

FAQs

1. How much screen time is safe for a baby?

For babies under 18 months, avoid screen time altogether except for video chats. For toddlers aged 2-5, limit screen time to one hour per day of high-quality content.

2. What are some quick screen-free activities for babies?

Quick activities include reading, sensory play with toys, peek-a-boo, and outdoor exploration like crawling on grass.

3. Why is screen time harmful for babies?

Screen time can delay cognitive and speech development, affect sleep patterns, and reduce attention spans due to overstimulation.

4. How do I stop using screens to calm my baby?

Use calming techniques like singing lullabies, offering a comfort object, or gently rocking your baby to soothe them instead of screens.

5. How can I limit screen time if I work from home?

Set boundaries for screen use, schedule breaks to interact with your baby, and create a designated screen-free zone for family time.

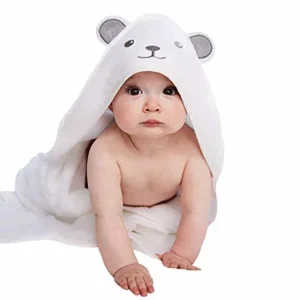
Babies are bundles of joy, but they sure go through a lot of towels! Hooded towels are a must-have for keeping your little one warm and dry after bath time. But how many hooded towels does your baby need? In this guide, we’ll cover everything you need to know about hooded baby towels—from how many to buy, to tips for choosing the right ones.

Why Do Babies Need Hooded Towels?

Hooded towels aren’t just adorable—they serve a very practical purpose. Here’s why hooded towels are essential for your baby:

  1. Keeps Baby Warm: Babies lose heat quickly after a bath. The hood helps to cover their wet head and prevent heat loss.
  2. Soft and Gentle: Baby skin is sensitive, and hooded towels are typically made of ultra-soft materials like cotton or bamboo.
  3. Quick Drying: The design allows you to wrap your baby snugly and dry them faster.
  4. Comfort and Security: The hood gives a sense of coziness and helps babies feel secure after their bath.

How Many Hooded Towels Do You Need for a Baby?

The number of hooded towels you need for your baby depends on a few factors, such as your laundry habits and how often your baby bathes. Here’s a general guideline:


Hooded Towels for Baby
How Many Hooded Towels for Baby? 

Minimum Number of Hooded Towels

  • 3 to 4 Hooded Towels: This is the absolute minimum if you do laundry frequently (every 1-2 days).
  • If you bathe your baby 3 times a week, having 3 to 4 towels ensures you always have a clean one ready.

Optimal Number of Hooded Towels

  • 5 to 7 Hooded Towels: For most parents, having 5-7 hooded towels is ideal. This gives you enough flexibility to handle messy baths or unexpected laundry delays.
  • This number works well if you wash towels once or twice a week.

Factors That Influence How Many Towels You Need

  1. Laundry Frequency: If you don’t do laundry often, having more towels will save you stress.
  2. Spit-ups and Accidents: Babies can be unpredictable! Extra towels can come in handy for unexpected messes.
  3. Climate: In colder climates, you may need more frequent baths to keep the baby warm and clean, meaning more towels are needed.

How Often Should You Wash Hooded Towels?

Babies have delicate skin, so maintaining towel hygiene is crucial. Here are some tips for washing hooded towels:

  • After 2-3 Uses: Ideally, wash the towel after every 2-3 uses to prevent bacteria buildup.
  • Immediate Washing: If the towel becomes soiled or develops a smell, wash it immediately.
  • Use Baby-Safe Detergent: Opt for a gentle, fragrance-free detergent to protect your baby’s skin.
  • Dry Thoroughly: Ensure towels are completely dry to prevent mold and mildew.

Choosing the Best Hooded Towels for Your Baby

When it comes to baby towels, quality matters. Here’s how to choose the best-hooded towels for your little one:

Material Matters

  1. Cotton: Soft, absorbent, and breathable. Ideal for sensitive baby skin.
  2. Bamboo: Naturally hypoallergenic and super absorbent. Perfect for babies with eczema or allergies.
  3. Microfiber: Quick-drying and lightweight but less breathable than cotton or bamboo.

Size and Thickness

  • Newborns: Smaller towels (30×30 inches) work well.
  • Toddlers: Larger sizes (35×35 inches) will last longer as your child grows.
  • Thickness: Opt for a towel that is thick enough to dry quickly but not too heavy for baby’s comfort.

Safety and Durability

  • Stitching: Look for reinforced edges to avoid fraying.
  • Chemical-Free: Choose organic or OEKO-TEX-certified towels to avoid harmful chemicals.
  • Durability: Towels should withstand frequent washing without losing softness.

Top 5 Hooded Towel Brands for Babies

Choosing a high-quality hooded towel makes all the difference. Here are some trusted brands:

  1. Burt’s Bees Baby: Organic cotton, soft, and durable.
  2. Aden + Anais: Known for their soft, breathable muslin towels.
  3. Luvable Friends: Budget-friendly and great for everyday use.
  4. Hudson Baby: Offers thick, plush towels at a reasonable price.
  5. Natemia: Luxury bamboo towels perfect for sensitive skin.


Hooded Towels for Baby

Tips for Caring for Hooded Baby Towels

Want your towels to last? Follow these care tips:

  1. Wash Before First Use: Removes any residue or lint.
  2. Use Warm Water: Hot water can damage fibers.
  3. Avoid Fabric Softeners: They can reduce towel absorbency.
  4. Air Dry or Low Heat: Preserve the softness by avoiding high heat.

When to Replace Hooded Towels

Babies grow quickly, and so does their need for larger towels. Here’s when to replace them:

  • Signs of Wear: Frayed edges or thinning fabric.
  • Outgrowing Size: When baby no longer fits comfortably.
  • Loss of Softness: Towels that become rough may irritate the baby’s skin.

Conclusion

Hooded towels are an essential part of your baby’s bath routine. For most parents, having 5 to 7 hooded towels ensures you’re always prepared, even with occasional laundry delays or unexpected messes. Choose high-quality, soft materials like cotton or bamboo, and follow proper care guidelines to keep them clean and durable. By planning, you’ll keep bath time cozy, warm, and stress-free for both you and your baby.

FAQs

1. How many hooded towels do I need for a newborn?

For a newborn, 4-5 hooded towels should be sufficient, especially if you do laundry frequently.

2. Are hooded towels safe for babies?

Yes, hooded towels are safe and help keep your baby warm after a bath. Just ensure they are made of soft, breathable materials.

3. How long do hooded baby towels last?

With proper care, hooded towels can last 1-2 years, depending on quality and frequency of use.

4. Can I use regular towels instead of hooded baby towels?

While you can, hooded towels are specifically designed to keep babies warm and are sized appropriately for their small bodies.

5. How do I keep hooded towels soft?

Avoid fabric softeners, wash with baby-safe detergent, and dry on low heat or air-dry to maintain softness.

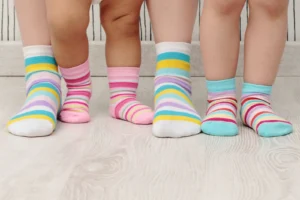
Every parent has faced the frustrating battle of keeping socks on their baby’s feet. One moment they’re cozy and warm, the next, one sock is lost in the abyss of the car seat, stroller, or grocery store aisle. So how can you keep those tiny socks from constantly slipping off? In this article, we’ll explore 15 foolproof strategies to keep your baby’s feet snug and secure. Discover how to keep socks on your baby.

Let’s dive in and say goodbye to the endless sock hunt!

Why Babies Lose Their Socks

1.1 Babies’ Constant Movement

Babies are natural wiggle machines. Whether they’re kicking, squirming, or exploring the world, all that movement can easily dislodge their socks. Unlike adults, babies don’t understand the need to keep their feet covered, making socks an easy target for curious toes and busy hands.

1.2 Sock Fit and Material Issues

Another major reason socks fall off is poor fit or the wrong materials. Socks that are too tight may slip off as babies move, while loose socks can easily get kicked off. Additionally, some fabrics, like stiff cotton blends, don’t grip as well as others. Choosing the right fit and material is key to keeping socks on.

Choosing the Right Baby Socks

2.1 Importance of Sock Fit

Choosing the correct size is essential. Baby socks should be snug, but not tight, around the ankles and feet. They should stay in place without leaving red marks or indentations. Opt for socks with elastic bands that gently hug your baby’s foot without constricting circulation.

2.2 Best Materials for Baby Socks

Soft, stretchy materials work best for babies. Fabrics like:

  • Cotton blends with elastane or spandex for flexibility
  • Bamboo for breathability and softness
  • Merino wool for warmth and moisture-wicking properties

Avoid stiff or scratchy materials that can cause discomfort or slip easily.

2.3 Types of Socks That Stay Put

Look for socks specifically designed to stay on, such as:

  • Grip socks with silicone dots
  • Elastic-cuff socks that gently hold the ankle
  • Fold-over socks with an extra cuff layer for security

Brands like Gerber, Trumpette, and Jefferies Socks offer reliable options.


how to keep socks on baby
How to keep socks on baby

Sock Clips and Fasteners

Sock clips and fasteners are game-changers for keeping socks on. These clever accessories attach to your baby’s socks and pants, preventing socks from slipping off. Brands like Sock-Ons offer stretchy, easy-to-use bands that secure socks without discomfort. They’re ideal for everyday use and can save you from constantly searching for missing socks.

Baby Booties: A Secure Alternative

Booties are a great alternative to socks. They’re designed to stay on with features like adjustable straps, snaps, or elasticized openings. Brands like Zutano and Robeez offer soft, secure booties that are both stylish and practical. Booties are perfect for babies who tend to lose socks easily.

Layering Socks Under Pants

A simple but effective trick is tucking socks under your baby’s pants. Pulling pants over the sock cuffs can create a barrier that helps socks stay put. This method works best with stretchy, snug-fitting pants like leggings or joggers.

Sock-Staying Brands to Consider

Some brands are known for making baby socks that stay on. Here are a few parent favorites:

  1. Trumpette – Stylish and snug socks with elastic bands.
  2. Jefferies Socks – High-quality socks with excellent grip.
  3. Hanes – Affordable options with comfort and elasticity.
  4. Gerber – Reliable baby socks with stretchable cuffs.
  5. Zutano Booties – Perfect for newborns and active infants.

Investing in these brands can save you the hassle of constantly replacing lost socks.

Using Sock-Ons or Sock Garters

Sock-ons are specially designed elastic bands that slide over your baby’s socks to keep them in place. These simple yet effective accessories ensure socks stay on even during intense kicking sessions. They’re soft and safe, and don’t leave marks on delicate baby skin.

Alternatively, sock garters provide a similar solution by gently securing socks at the ankles. Both options are easy to use, cost-effective, and widely available online or at baby stores. Parents who have tried Sock-Ons often rave about their effectiveness in preventing sock loss.

Onesies with Built-in Footies

Footed onesies are a lifesaver when it comes to keeping little feet covered. These one-piece outfits include built-in socks (also known as footies) that can’t slip off. They’re perfect for cold weather or bedtime, ensuring your baby stays warm and snug throughout the night.

When selecting footed onesies, opt for:

  • Zippered onesies for quick diaper changes
  • Snap closures for added flexibility
  • Fleece-lined options for extra warmth

Brands like Carter’s, Burt’s Bees Baby, and Little Sleepies offer high-quality footed onesies that combine comfort and practicality.

Fold-Over Cuffs for Extra Grip

Fold-over cuffs provide an additional layer of grip around your baby’s ankles. Many baby socks come with cuffs that can be folded down for a snug fit or pulled up for extra coverage. This feature helps keep socks secure and prevents them from sliding off during movement.

When shopping for fold-over socks, consider options made from:

  • Stretchy cotton blends for flexibility
  • Terry cloth for added warmth
  • Wool blends for colder weather

These socks offer versatility and a secure fit, making them a staple for any baby’s wardrobe.

Baby Shoes: Do They Help?

While baby shoes aren’t necessary for non-walking infants, they can help keep socks on during outings. Soft-soled baby shoes or pre-walkers add a layer of protection and hold socks in place.

When choosing baby shoes, look for:

  • Soft, flexible soles that mimic natural foot movement
  • Velcro straps for easy adjustments
  • Breathable materials to prevent overheating

Brands like Robeez, Stride Rite, and See Kai Run offer excellent options for pre-walking babies. Remember, comfort and flexibility are key to keeping your baby happy while securing those socks!

When to Go Sock-Free

Sometimes, the best solution is simply to let your baby go sock-free. If you’re indoors and the temperature is warm, allowing your baby’s feet to remain bare can be beneficial. It promotes natural development, improves sensory feedback, and helps babies learn to use their toes for balance.

Consider going sock-free when:

  • The environment is warm and comfortable
  • Your baby is playing on a soft, clean surface
  • You want to encourage foot and toe movement

Just keep an eye on the room temperature to ensure your baby doesn’t get cold.

DIY Solutions for Keeping Socks On

If you’re feeling crafty, there are several DIY methods to keep socks in place:

  1. Sewing elastic bands into the cuffs of baby socks for a custom fit.
  2. Using hair ties (loosely) over socks for temporary grip.
  3. Create sock clips by attaching small binder clips to your baby’s pants and socks.

These homemade solutions can be quick fixes, but always ensure they’re safe and comfortable for your baby.


how to keep socks on baby
How to keep socks on baby

Tips for Older Babies and Toddlers

As babies grow into toddlers, the sock struggle can continue. Here are some tips for keeping socks on older babies:

  1. Choose fun, colorful socks that your toddler enjoys wearing.
  2. Involve them in the process by letting them choose their socks.
  3. Use non-slip socks for added grip during playtime.
  4. Reinforce habits by explaining the importance of keeping feet warm.

Making socks fun and engaging can help older babies and toddlers keep them on willingly.

Common Mistakes to Avoid

Keeping socks on your baby can be tricky, but avoid these common mistakes:

  1. Buying socks that are too tight or too loose. Proper fit is key to keeping socks secure.
  2. Ignoring material quality. Choose breathable, stretchy fabrics for comfort.
  3. Overlooking sock alternatives. Booties, footed onesies, and sock clips can be lifesavers.
  4. Neglecting seasonal needs. Ensure socks are warm in winter and breathable in summer.

Avoiding these pitfalls can make the sock-wearing experience smoother for both you and your baby.

Conclusion

Keeping socks on a baby doesn’t have to be an endless struggle. By choosing the right fit, materials, and accessories, you can ensure your baby’s feet stay warm and cozy. From using Sock-Ons and booties to opting for footed onesies, these tips will help you tackle the sock battle with confidence. No more lost socks or cold toes—just happy, warm feet for your little one!

FAQs

1. Why do my baby’s socks keep falling off?

Babies’ constant movement and poorly fitting socks are the most common reasons socks fall off. Choosing the right size and materials helps keep socks secure.

2. Are booties better than socks for newborns?

Yes, booties often stay on better than socks due to their adjustable straps or elastic openings. They’re a great option for newborns.

3. What are Sock-Ons, and do they work?

Sock-ons are elastic bands that fit over baby socks to keep them in place. They’re effective and popular among parents for preventing lost socks.

4. How can I keep socks on during sleep?

Footed onesies or sleep sacks with built-in footies are ideal for keeping socks on during sleep. They provide warmth and stay put.

5. Should babies always wear socks?

Not necessarily. If the temperature is warm and the environment is safe, going sock-free can benefit your baby’s foot development.

Why Baby Wipes are a Must-Have for Parents

Baby wipes are a staple in every parent’s toolkit. They are:

  • Convenient: Perfect for quick diaper changes and cleaning messes on the go.
  • Versatile: Can be used for wiping hands, and faces, and even cleaning surfaces.
  • Gentle: Designed with sensitive baby skin in mind, often hypoallergenic and fragrance-free.

Given how often babies need diaper changes and clean-ups, baby wipes are indispensable. But stocking up without knowing how many you’ll need can lead to waste or running out too quickly.

Factors Affecting How Many Baby Wipes You Need

Several factors determine how many baby wipes you’ll go through:

  1. Baby’s Age
    • Newborns typically require more frequent diaper changes and clean-ups.
    • Toddlers may need fewer wipes as they begin potty training.
  2. Frequency of Diaper Changes
    • Most newborns need 8-12 diaper changes per day.
    • As babies grow older, this reduces to 6-8 changes per day.
  3. Type of Mess
    • Wet diapers usually require 1-2 wipes.
    • Poopy diapers might need 3-5 wipes, depending on the mess.
  4. Baby’s Skin Sensitivity
    • If your baby has sensitive skin, you may use more wipes to ensure thorough cleaning without irritation.
  5. Other Uses
    • Parents often use wipes for quick clean-ups of hands, faces, and spills, increasing usage.

How Many Baby Wipes Per Day?

On average, here’s how many baby wipes you’ll use daily:

Baby’s Age Diaper Changes Per Day Wipes Per Diaper Change Total Wipes Per Day
Newborn (0-3 months) 8-12 2-5 20-60
Infant (3-6 months) 6-8 2-4 12-32
Toddler (6-12 months) 6-8 1-3 6-24
Toddler (12-24 months) 4-6 1-2 4-12

Example Scenario:

  • Newborn: 10 diaper changes × 4 wipes per change = 40 wipes per day.
  • Toddler: 6 diaper changes × 2 wipes per change = 12 wipes per day.

How Many  Wipes Per Week?

Let’s calculate weekly usage based on daily averages:

Baby’s Age Wipes Per Day Total Wipes Per Week
Newborn (0-3 months) 40 280
Infant (3-6 months) 20 140
Toddler (6-12 months) 15 105
Toddler (12-24 months) 10 70

For newborns, expect to use around 280 wipes per week. For toddlers, this reduces to around 70-105 wipes per week.

How Many Wipes Per Month?

Here’s a monthly breakdown of baby wipe usage:

Baby’s Age Total Wipes Per Week Total Wipes Per Month (4 Weeks)
Newborn (0-3 months) 280 1,120
Infant (3-6 months) 140 560
Toddler (6-12 months) 105 420
Toddler (12-24 months) 70 280

Stocking Up Tip:

For a newborn, plan to purchase around 1,100 to 1,200 wipes per month. For older babies or toddlers, 400-600 wipes per month should suffice.

How Many Wipes for a Year?

To help you budget and stock up, here’s a yearly estimate:

Baby’s Age Wipes Per Month Total Wipes Per Year
Newborn (0-3 months) 1,120 13,440
Infant (3-12 months) 560 6,720
Toddler (12-24 months) 400 4,800

On average, you’ll go through 10,000-12,000 wipes in your baby’s first year.


how many wipes do you need for a baby

Cost of Baby Wipes: How Much to Budget?

Baby wipes can vary in price based on the brand and quality. Here’s a cost breakdown:

  • Budget Brands: $0.02-$0.03 per wipe
  • Mid-Range Brands: $0.03-$0.05 per wipe
  • Premium Brands: $0.05-$0.07 per wipe

Monthly Cost Estimate:

  • Newborns (1,200 wipes): 1,200 × $0.03 = $36 per month
  • Toddlers (400 wipes): 400 × $0.03 = $12 per month

Annual Cost Estimate:

  • For newborns: $400-$500 per year on wipes.

Tips for Saving on Baby Wipes

  1. Buy in Bulk: Buying larger packs or subscribing to delivery services can save money.
  2. Store Brands: Many brands offer comparable quality to name brands for less.
  3. Reusable Cloth Wipes: If you’re eco-conscious, reusable wipes can reduce costs long-term.
  4. Coupons and Discounts: Watch for promotions or join baby supply mailing lists.

Choosing the Right Baby Wipes

When selecting wipes, consider:

  • Ingredients: Look for fragrance-free, hypoallergenic options for sensitive skin.
  • Thickness: Thicker wipes are more durable and may reduce how many you use.
  • Eco-Friendliness: Biodegradable wipes are a sustainable option.

Conclusion

Knowing how many wipes you need helps you plan better and stay stocked up without overspending. Newborns generally require more wipes, while usage gradually decreases as your child grows. By understanding daily, weekly, and monthly needs, you can confidently prepare for your baby’s care. Remember to buy in bulk, look for deals, and choose the best wipes for your baby’s skin.

FAQs

1. How many baby wipes should I pack in a diaper bag?
Pack around 10-20 wipes for a day trip to cover diaper changes and small messes.

2. How long does a pack of baby wipes last?
A typical pack of 80 wipes may last around 2-4 days for a newborn.

3. Can I use baby wipes for other purposes?
Yes! They are great for wiping hands, and faces, and cleaning up small spills.

4. Do baby wipes expire?
Unopened wipes last about 2 years, while opened packs should be used within 3 months.

5. How many baby wipes should I buy before my baby arrives?
Stock up on 1,000-1,200 wipes for the first month to be safe.