asrar, Author at Cradle Cuteness-Cherishing Babyhood with Style - Page 2 of 7
Author

asrar

Browsing

What is a Baby Shower Head Protector?

A baby shower head protector is a wearable, water-resistant shield designed to protect your baby’s face, eyes, and ears from water and shampoo during bath time. Shaped like a cap or visor, these protectors usually come with an adjustable band to ensure a snug and comfortable fit.

Baby shower head protectors are made from soft, flexible materials such as silicone or EVA foam. They are designed to channel water away from your baby’s face, making bath time safer and more enjoyable. This simple accessory helps reduce the stress of bathing a squirming infant or toddler and minimizes the risk of shampoo or soap irritation.

Why You Need a Baby Shower Head Protector

Many parents wonder if a baby shower head protector is vital. Here are some key reasons why you might want to invest in one:

1. Prevents Water and Shampoo Irritation

Babies’ eyes and skin are sensitive. A shower head protector keeps shampoo and soap from trickling into their eyes, reducing discomfort and irritation.

2. Reduces Bath Time Stress

Bath time can be a struggle if your baby fears water. A protector helps ease this fear by shielding their face, making bath time less stressful for both you and your little one.

3. Encourages Independence

As your child grows, they may resist help during bath time. A shower head protector empowers them to enjoy washing their hair independently.

4. Protects Ears

Some babies are prone to ear infections. A well-designed head protector can prevent water from getting into their ears.

Top Features to Look for in a Baby Shower Head Protector

Choosing the right shower head protector can make a huge difference. Here are some essential features to consider:

1. Material

Opt for safe, non-toxic materials like silicone or EVA foam. These materials are durable, water-resistant, and comfortable against your baby’s skin.

2. Adjustability

Babies grow quickly. Look for protectors with adjustable straps or buttons to ensure a custom fit as your child grows.

3. Comfort and Fit

A good head protector should fit snugly but not too tightly. The design should be lightweight and comfortable to wear for longer bath sessions.

4. Waterproof and Durable

Ensure the protector is 100% waterproof and durable enough to withstand regular use.

5. Easy to Clean

Choose a design that is easy to clean or rinse after each use to maintain hygiene.

Best Baby Shower Head Protectors on the Market

Here are some of the top-rated baby shower head protectors available in 2024:

1. BabyBibi Adjustable Baby Shower Cap

  • Material: Soft EVA foam
  • Features: Adjustable strap, waterproof, durable
  • Pros: Affordable, lightweight, easy to clean
  • Best For: Budget-conscious parents

2. Munchkin Soft Silicone Shower Visor

  • Material: BPA-free silicone
  • Features: Flexible fit, soft material, ear protection
  • Pros: Gentle on the skin, no-slip design
  • Best For: Babies prone to ear infections

3. Skip Hop Bath Time Shield

  • Material: Phthalate-free plastic
  • Features: Full face coverage, adjustable fit, playful design
  • Pros: Fun designs, sturdy build, reliable protection
  • Best For: Toddlers who love playful bath gear

Each of these products has been tested and reviewed positively by parents. Consider your baby’s needs and preferences when making a choice.
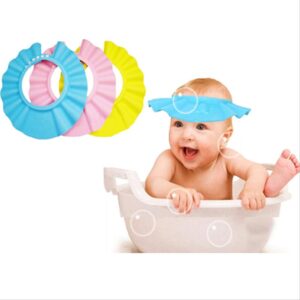
 

baby shower head protector
Baby Shower Head Protector: Keep your little one safe

How to Use a Baby Shower Head Protector Correctly

Using a baby shower head protector is straightforward, but following these steps ensures the best results:

  1. Adjust the Fit:
    Place the protector around your baby’s head, adjusting the strap or buttons until it fits snugly but comfortably.
  2. Position the Visor:
    Make sure the brim of the protector sits slightly above the eyebrows and covers the forehead.
  3. Test Before Bath Time:
    Let your baby wear the protector before bath time to get used to the feeling.
  4. Pour Water Carefully:
    Gently pour water over your baby’s head, allowing the visor to channel the water away from their face.

Tips for a Safe and Enjoyable Bath Time

Making bath time safe and enjoyable is key to building a positive experience for your baby. Here are some practical tips to follow:

1. Ensure the Water Temperature is Just Right

  • The ideal bath temperature for babies is around 98.6°F (37°C).
  • Use a baby bath thermometer to check the water temperature.

2. Keep Everything Within Arm’s Reach

  • Have essentials like soap, shampoo, towels, and a shower head protector within easy reach.
  • This helps you stay focused on your baby without distractions.

3. Create a Calming Atmosphere

  • Soft lighting, gentle music, or soothing words can help relax your baby during bath time.
  • Engage them with toys or playful bubbles to make bath time fun.

4. Never Leave Your Baby Unattended

  • Even a few seconds away can pose a risk. Always stay close and keep your hands ready to support your baby.

5. Make Drying Off Comfortable

  • Use a soft, warm towel immediately after bath time. Pat your baby dry gently to avoid skin irritation.

6. Keep Bath Time Short

  • 10 to 15 minutes is ideal for a baby’s bath time. Longer baths can lead to dry skin.

Benefits of Using a Baby Shower Head Protector

Using a baby shower head protector offers numerous benefits that make bath time safer and more enjoyable for both you and your baby.

1. Reduces Tears and Tantrums

Babies often cry when shampoo or water gets into their eyes. A shower head protector eliminates this discomfort, making bath time more pleasant.

2. Promotes Consistent Hygiene

When bath time is stress-free, it’s easier to establish a consistent routine, ensuring your baby stays clean and fresh.

3. Boosts Confidence

A relaxed, tear-free bath helps your baby feel more confident in the water, setting the stage for easier transitions to independent bathing.

4. Affordable and Long-Lasting

Most shower head protectors are budget-friendly and can last through your child’s early years, offering excellent value for money.

5. Peace of Mind for Parents

Knowing your baby is protected from water-related irritations gives you peace of mind during bath time.

Common Mistakes to Avoid

Even with the best tools, mistakes can happen. Here are some pitfalls to avoid when using a baby shower head protector:

1. Choosing the Wrong Size

  • Ensure the protector is adjustable and fits snugly on your baby’s head. A loose protector won’t keep water out effectively.

2. Ignoring Your Baby’s Comfort

  • If your baby shows discomfort, check if the protector is too tight or irritating the skin. Adjust the fit as needed.

3. Forgetting to Check the Material

  • Choose protectors made from BPA-free, non-toxic materials to ensure the safety of your baby.

4. Not Practicing Before Bath Time

  • Introduce the protector outside of bath time to get your baby used to wearing it. This reduces resistance during actual baths.

5. Overfilling the Bathtub

  • Keep water levels shallow to avoid unnecessary splashing and make the protector more effective.

FAQs About Baby Shower Head Protectors

1. At What Age Can I Start Using a Baby Shower Head Protector?

Most shower head protectors are suitable for babies as young as 6 months. Ensure your baby can sit up unassisted before introducing one.

2. How Do I Clean a Baby Shower Head Protector?

Wipe the protector with a damp cloth or rinse it under running water. Allow it to air dry after each use to prevent mold or mildew buildup.

3. Is a Baby Shower Head Protector Safe for Newborns?

It’s generally better to wait until your baby can sit up independently. For newborns, use gentle water-pouring techniques instead.

4. Can the Protector Be Used in a Shower Instead of a Bath?

Yes! Shower head protectors work well for both baths and showers, especially for toddlers who prefer standing up.

5. What If My Baby Doesn’t Like Wearing It?

Introduce the protector gradually. Let your baby play with it or watch you wear it first to make it seem less intimidating.

Conclusion

A baby shower head protector is a simple yet essential tool for making bath time stress-free, safe, and enjoyable. With a wide range of options available, you can easily find one that suits your baby’s needs and preferences. By investing in the right shower head protector, you’re not only protecting your baby’s sensitive eyes and ears but also creating a positive bath time experience for years to come.

Whether you’re a new parent or have a growing toddler, using a baby shower head protector can make all the difference. Happy bathing!

How to Dress Baby for Sleep: A Comprehensive Guide for Parents

Sleep is essential for your baby’s growth and well-being, but ensuring your little one sleeps comfortably can be tricky, especially for new parents. A crucial part of this equation is how to dress your baby appropriately for bedtime. Too many layers can cause overheating, while too few might leave your baby feeling cold. This guide will help you navigate this parenting challenge with confidence.

Why Dressing Your Baby for Sleep Matters

Babies cannot regulate their body temperature as efficiently as adults, making them more susceptible to overheating or getting too cold. Proper sleepwear ensures:

  • Comfort: Helps your baby settle and stay asleep longer.
  • Safety: Reduces the risk of overheating, a contributing factor to Sudden Infant Death Syndrome (SIDS).
  • Peace of Mind for Parents: Knowing your baby is dressed appropriately means you can sleep easier, too.


How to Dress Baby for Sleep

Key Factors to Consider When Dressing Your Baby for Sleep

1. Room Temperature

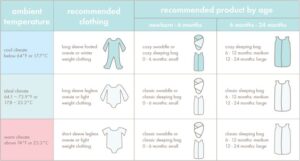
Room temperature plays a pivotal role in deciding what your baby should wear. The ideal temperature for a baby’s room is between 68°F to 72°F (20°C to 22°C).

  • Warm Rooms (72°F or higher): A light onesie or sleep sack with a low TOG (Thermal Overall Grade) rating.
  • Cool Rooms (68°F or lower): Use a long-sleeved onesie, footed pajamas, and a thicker sleep sack or swaddle.

2. TOG Rating Explained

The TOG rating measures the warmth of a fabric. Here’s a quick guide:

  • 0.2-0.5 TOG: Lightweight fabrics for hot climates or summer.
  • 1.0 TOG: Moderate warmth, suitable for spring and autumn.
  • 2.5 TOG: Heavier materials for cold winter nights.

3. Your Baby’s Age and Mobility

  • Newborns (0-3 months): Swaddling is recommended to mimic the womb’s snug environment. Use lightweight swaddle blankets or sacks.
  • Older Babies (3+ months): Transition to a sleep sack or wearable blanket to allow for movement while maintaining warmth.

Seasonal Dressing Tips for Baby Sleep

Dressing Baby for Summer Nights

During summer, prioritize breathability and avoid over-layering.

  • Choose light cotton onesies or short-sleeved bodysuits.
  • Opt for a 0.2-0.5 TOG sleep sack for added comfort.
  • Avoid blankets; they increase the risk of overheating.


How to Dress Baby for Sleep

Dressing Baby for Winter Nights

Cold weather calls for layering, but with care to prevent overheating.

  • Use footed pajamas made of fleece or thermal materials.
  • Add a 2.5 TOG sleep sack or swaddle over the pajamas.
  • Avoid hats or scarves; they can pose a suffocation hazard.

Dressing Baby for Spring and Autumn

Transitional seasons require flexibility.

  • Choose long-sleeved onesies paired with a medium-weight sleep sack.
  • Monitor the room temperature closely to adjust layers as needed.

How to Check if Your Baby is Too Hot or Cold

Use these cues to ensure your baby is comfortable:

  • Signs of Overheating: Sweaty back, flushed skin, rapid breathing, or fussiness.
  • Signs of Feeling Cold: Cool hands, feet, or nape of the neck.

Always check your baby’s temperature by feeling their chest or back, not their extremities.

Safe Sleep Guidelines for Babies

When dressing your baby for sleep, keep safety in mind:

  1. Avoid Loose Blankets: Instead, use sleep sacks or swaddles.
  2. No Hats Indoors: Babies release heat through their heads.
  3. Ensure a Snug Fit: Pajamas and sleepwear should be snug to avoid covering the face.
  4. Back to Sleep: Always place your baby on their back to sleep.

Common Mistakes Parents Make When Dressing Babies for Sleep

1. Over-Layering

Adding too many layers can cause your baby to overheat. Stick to the recommended TOG ratings and room temperature guidelines.

2. Ignoring Room Conditions

Using heavy pajamas in a well-heated room can be uncomfortable for your baby. Always adjust sleepwear based on the environment.

3. Using Unsafe Materials

Avoid sleepwear with strings, hoods, or other choking hazards. Opt for baby-safe, flame-resistant materials.


How to Dress Baby for Sleep

Top Baby Sleepwear Recommendations

To make your shopping easier, here are some tried-and-true sleepwear options:

Brand Best For Key Features
Love to Dream Swaddling Newborns Easy zip-up design, snug fit
Halo SleepSack Winter Wear High TOG rating, soft fleece material
Burt’s Bees Baby Summer Pajamas Organic cotton, breathable fabric
Kyte Baby All-Season Sleepwear Bamboo material, natural temperature control

When to Seek Advice from a Pediatrician

If your baby frequently wakes up sweaty, seems unusually fussy, or shows signs of sleep disturbances, consult your pediatrician. They can help rule out any underlying issues or provide tailored advice on sleepwear.

Conclusion

Dressing your baby for sleep doesn’t have to be a guessing game. With a little knowledge and the right sleepwear, you can ensure your baby stays comfortable, safe, and cozy through the night. Remember to monitor room conditions, use appropriate TOG ratings, and follow safe sleep practices to create an ideal sleep environment for your little one.

FAQs

1. Can my baby wear socks to bed?
Yes, if the room is cool and your baby’s feet feel cold. However, footed pajamas are a better option for younger infants.

2. How do I know if my baby is too warm?
Feel their chest or back. If they’re sweaty or their skin feels hot, remove a layer immediately.

3. Is swaddling necessary for newborns?
Swaddling can help newborns feel secure and sleep better, but stop swaddling once they show signs of rolling over.

4. Can I use a blanket instead of a sleep sack?
It’s safer to use a sleep sack to reduce the risk of suffocation or entanglement.

5. Should my baby wear a hat to sleep in winter?
No, hats can cause overheating and increase the risk of suffocation.

Raising twins comes with unique joys and challenges, and one area of concern for many parents is speech development. Twins, especially identical ones, are often compared in their milestones, leading to heightened awareness of speech delays. In this blog post, we’ll dive deep into the causes of speech delays in twins, practical ways to help them, and when to seek professional guidance.

1. What Is Speech Delay?

Speech delay occurs when a child fails to meet expected speech and language milestones for their age. This can include difficulties in:

  • Producing sounds or words
  • Forming sentences
  • Understanding language
  • Engaging in age-appropriate conversations

For twins, speech delay is relatively common, with research suggesting that 47% of twins experience delays compared to single-born children. Understanding this difference begins with examining the underlying causes.

2. Why Are Speech Delays More Common in Twins?

Speech delays in twins are influenced by a combination of environmental and biological factors. Let’s break these down:

Environmental Factors

  1. Shared Parental Attention
    Twins share parental time and attention, which can limit one-on-one interactions crucial for language development.
  2. Less Individual Interaction
    Twins often rely on each other for communication, reducing the need to interact with adults who model advanced language.
  3. Twin Talk (Cryptophasia)
    A unique language or set of sounds shared between twins can delay the development of conventional speech.

Biological Factors

  1. Premature Birth
    Twins are more likely to be born prematurely, which can affect brain development and delay speech milestones.
  2. Low Birth Weight
    Low birth weight, another common factor in twins, is linked to developmental delays, including language skills.
  3. Genetic Predisposition
    Some twins inherit genetic factors that predispose them to speech and language delays.

3. Signs of Speech Delay in Twins

Identifying speech delays early can help you intervene effectively. Common signs include:

  • 12 months: Limited or no babbling, lack of response to sounds or names.
  • 18 months: Difficulty imitating sounds, fewer than 10 words in their vocabulary.
  • 24 months: Inability to form simple two-word phrases, vocabulary under 50 words.
  • 3 years: Difficulty expressing needs, reduced comprehension of basic instructions.

Twins may also exhibit challenges unique to their bond, such as relying on gestures or made-up language instead of using words.

4. Twin-Specific Challenges in Speech Development

Twins face some unique obstacles when it comes to language acquisition:

  • Reliance on Each Other: Twins often communicate nonverbally or in their own “twin language,” reducing the need for verbal communication.
  • Comparisons Between Twins: Parents may unconsciously compare the twins, which can either discourage the slower child or cause unnecessary stress.
  • Sibling Rivalry: Competing for attention might discourage one twin from speaking up, especially in a shared environment.

5. How to Support Twins with Speech Delays

If you suspect your twins are experiencing a speech delay, you can take proactive steps to support their language development.

Creating a Language-Rich Environment

  • Narrate Daily Activities: Explain what you’re doing, using simple sentences.
  • Read Aloud Regularly: Choose books with vivid pictures and repetitive phrases.
  • Use Songs and Rhymes: Music fosters language rhythm and vocabulary building.

Encouraging Individual Communication

  • Spend One-on-One Time: Dedicate time to each twin individually to boost their confidence and communication skills.
  • Address Each Twin by Name: Avoid using collective terms like “the twins” to encourage individuality.
  • Model Correct Speech: Gently correct their pronunciation without discouraging their efforts.


Twins and Speech Delay

6. The Role of Twin Talk or Cryptophasia

One fascinating aspect of twin speech delay is the phenomenon of cryptophasia—a private language shared by twins. It often includes unique words, sounds, or gestures that only they understand. While this “twin talk” strengthens their bond, it can inadvertently delay speech development because:

  • Twins may rely on cryptophasia instead of learning proper words.
  • Reduced interaction with adults or other children limits exposure to standard language models.

What Can Parents Do?
Encourage individual communication and expose the twins to environments where they interact with other children or adults, reducing dependence on twin talk.

7. When to Seek Professional Help

It’s natural for parents to wonder when a speech delay warrants professional attention. The following red flags indicate that it’s time to consult a pediatrician or speech-language pathologist:

  • One or both twins fail to meet basic speech milestones (e.g., no words by 18 months).
  • You notice a lack of comprehension or difficulty following instructions.
  • The twins primarily use gestures or sounds to communicate beyond age two.
  • Persistent reliance on twin talk, with minimal progression toward conventional speech.

How to Prepare for a Professional Visit

  1. Document Milestones: Record each twin’s language progress and note specific concerns.
  2. List Environmental Factors: Include any relevant details like premature birth or family history of speech issues.
  3. Observe Behavioral Patterns: Highlight differences in how each twin communicates individually and together.

8. Speech Therapy for Twins: What to Expect

Speech therapy can be highly effective for twins with language delays. Therapists typically assess each twin’s individual needs while also considering their unique dynamic as siblings.

The Assessment Process

  • Evaluation of Each Child: Therapists evaluate speech, comprehension, and overall language skills individually.
  • Dynamic Interactions: Observation of how the twins interact with each other and adults.
  • Tailored Goals: Setting achievable milestones for vocabulary, sentence formation, and articulation.

Types of Speech Therapy Activities

  1. Individual Sessions: Focus on each child separately to address their specific needs.
  2. Group Therapy: Allows the twins to practice language skills with peers in a structured setting.
  3. Parent Involvement: Parents are guided on reinforcing language exercises at home.

9. Tips for Preventing Speech Delays in Twins

While some delays are unavoidable due to biological factors, fostering a supportive environment can significantly reduce the risk.

Practical Tips for Parents

  • Limit Screen Time: Excessive screen use can interfere with natural language development.
  • Engage in Play-Based Learning: Use toys and games to encourage conversation.
  • Provide Equal Opportunities: Ensure both twins are encouraged to speak without dominating conversations.
  • Monitor Progress Separately: Treat each child as an individual with a unique timeline.

10. Frequently Asked Questions

Q1: Are speech delays more common in identical or fraternal twins?

Speech delays can occur in both identical and fraternal twins, but identical twins are slightly more likely to experience delays due to shared genetic factors and their tendency to communicate non-verbally.

Q2: Can bilingual households contribute to speech delays in twins?

Bilingualism itself doesn’t cause speech delays. Twins in bilingual households might initially develop speech more slowly as they navigate two languages, but they typically catch up with time.

Q3: Is cryptophasia harmful to speech development?

While cryptophasia is not harmful, it can delay standard speech if twins rely on it exclusively. Encouraging communication with others can help mitigate this.

Q4: How can I encourage my twins to speak individually?

Spend dedicated time with each twin, ask open-ended questions, and provide positive reinforcement when they attempt to communicate individually.

Q5: Can speech delay affect academic performance later?

Severe speech delays may impact reading, writing, and social skills if untreated. Early intervention ensures better outcomes in academic and social settings.

Conclusion

Speech delay in twins is a common yet manageable challenge. By understanding the causes, recognizing the signs, and providing the right support, parents can help their twins overcome language barriers and thrive. Whether it’s creating a language-rich environment or seeking professional help, early intervention is key to ensuring your children’s success.


Pacifiers can feel like a lifesaver for parents—soothing fussy babies and ensuring much-needed calm. But do pacifiers come with hidden risks, especially concerning your child’s speech development? It’s a question that sparks concern among parents and caregivers. In this post, we’ll dive into the science, expert opinions, and practical advice to answer this pressing question: Do pacifiers delay speech?

Understanding Speech Development in Infants

Speech development is a complex process that involves the coordination of cognitive, auditory, and motor skills.

Key Speech Milestones in Babies

  1. Babbling (4–6 months): Babies begin experimenting with sounds like “ba” and “da.”
  2. First Words (10–12 months): Simple words like “mama” or “dada” emerge.
  3. Word Combining (18–24 months): Toddlers begin combining two or more words to form simple sentences.

These milestones vary, but a significant delay may indicate developmental issues. Factors such as genetics, hearing ability, and environmental stimulation all play roles.


do pacifiers delay speech
Do Pacifiers Delay Speech? 

What Are Pacifiers and Why Are They Popular?

Pacifiers are small, nipple-shaped objects designed to satisfy a baby’s natural sucking reflex. They provide comfort, help soothe colicky infants, and even reduce the risk of sudden infant death syndrome (SIDS). However, their extended use raises questions about potential impacts on oral and speech development.

Benefits of Pacifiers

  • Comfort and Security: Pacifiers calm babies during stressful situations like vaccinations or long car rides.
  • SIDS Prevention: Studies suggest that pacifiers reduce the risk of SIDS when used during sleep.

While pacifiers have clear benefits, overuse may lead to concerns such as speech delays, dental problems, and dependency.

Can Pacifiers Delay Speech?

The short answer: Pacifiers can contribute to speech delays, but the connection is indirect and depends on usage habits.

How Pacifiers Might Impact Speech Development

  1. Reduced Babbling Time: Prolonged pacifier use may limit the time babies spend exploring sounds, a crucial part of language development.
  2. Oral Muscle Development: Speech requires well-coordinated movements of the tongue, lips, and jaw. Excessive pacifier use could hinder these muscles’ development.
  3. Limited Interaction: Babies with pacifiers in their mouths might be less likely to engage in vocal interactions with caregivers.

What the Research Says

Some studies suggest prolonged pacifier use correlates with speech delays, especially when used beyond 12–18 months. However, others argue the impact is minimal if used appropriately. The key lies in balance and moderation.

Guidelines for Pacifier Use to Avoid Speech Delays

Parents can reap the benefits of pacifiers while minimizing potential downsides with mindful practices.

1. Time Limits

  • Restrict pacifier use to naps and bedtime after 6 months.
  • Gradually phase out pacifier use by 12–18 months to avoid dependency.

2. Encourage Vocal Play

  • Spend time talking, singing, and reading to your baby.
  • Encourage babbling and mimic your baby’s sounds to foster interaction.


do pacifiers delay speech
Do Pacifiers Delay Speech? 

3. Choose Orthodontic Pacifiers

Opt for pacifiers designed to support oral development, reducing the risk of misaligned teeth or speech issues.

Alternatives to Pacifiers for Soothing Babies

If you’re worried about the impact of pacifiers, consider these alternatives:

  1. Comfort Items: Soft toys or blankets can provide a sense of security.
  2. Rocking and Cuddling: Physical touch and movement help soothe babies naturally.
  3. White Noise: Gentle background noise mimics the womb’s sounds and calms infants.

Signs of Speech Delay to Watch For

Early detection of speech delays is vital. Look out for:

  • Lack of babbling by 12 months.
  • Difficulty forming words by 18 months.
  • Limited vocabulary or inability to combine words by 24 months.

Consult a pediatrician or speech-language pathologist if you notice these signs.

When to Consult a Specialist

A professional evaluation is crucial if your child’s speech development seems delayed despite limited pacifier use. Experts can identify underlying causes such as hearing impairments, oral-motor issues, or neurodevelopmental conditions.

The Bottom Line: Balance Is Key

Pacifiers themselves aren’t inherently harmful, but their misuse can potentially contribute to speech delays. By following recommended guidelines and prioritizing interaction with your baby, you can foster healthy speech development while still reaping the benefits of pacifiers.


do pacifiers delay speech
Do Pacifiers Delay Speech? 

FAQs

1. How long is it safe to use a pacifier?
It’s best to wean your child off pacifiers by 12–18 months to minimize speech and dental development risks.

2. Are all pacifiers the same?
No. Orthodontic pacifiers are designed to reduce dental and oral development issues, making them a better choice.

3. Does pacifier use affect teeth?
Prolonged pacifier use may cause misaligned teeth or bite issues, especially after age 2.

4. Can pacifiers be used for breastfed babies?
Yes, but it’s advisable to introduce pacifiers only after well-established breastfeeding (around 3–4 weeks).

5. What’s the biggest factor in preventing speech delays?
Interaction is key! Talk, read, and engage with your baby daily to encourage healthy language development.

Introduction

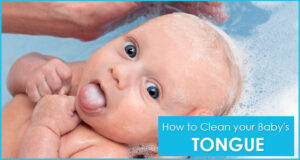
When you’re a new parent, everything feels like a new frontier—including cleaning your baby’s tiny tongue! While it might seem unnecessary, keeping your newborn’s tongue clean is essential for good oral hygiene and overall health. In this comprehensive guide, we’ll walk you through why tongue cleaning matters, the safest techniques to use, and tips to make it a seamless part of your baby care routine. Let’s dive in!

Why Cleaning a Newborn’s Tongue Is Important

Your newborn’s oral hygiene isn’t just about keeping their mouth clean—it’s about their overall well-being. Residue and buildup on the tongue, such as leftover milk or formula, can create an environment where bacteria thrive. This buildup can lead to:

  • Oral Thrush: A fungal infection that appears as white patches on the tongue and inside the cheeks.
  • Bad Breath: While rare in newborns, poor oral hygiene can still cause unpleasant smells.
  • Feeding Issues: A coated tongue can interfere with taste and lead to feeding discomfort.

By cleaning your baby’s tongue regularly, you’re helping to prevent these issues and encouraging healthy oral habits right from the start.

When Should You Start Cleaning Your Newborn’s Tongue?

The best time to start cleaning your baby’s tongue is as soon as they are a few days old. Even if they only consume breastmilk or formula, residue can accumulate. Establishing this habit early ensures your baby is comfortable with the process as they grow.

What Causes White Coating on a Newborn’s Tongue?

Not all white coating is the same, and understanding the cause is crucial:

  1. Milk Residue: Common in breastfed and formula-fed babies. It appears as a thin, white layer on the tongue and is harmless.
  2. Oral Thrush: Thrush is thicker and doesn’t wipe away easily. It may require medical treatment, so consult your pediatrician if you’re unsure.

Supplies You’ll Need for Cleaning Your Baby’s Tongue

Before starting, gather these essentials:

  • Soft, clean gauze or a baby-specific tongue cleaner
  • Sterile water (boiled and cooled)
  • A soft, damp washcloth
  • Clean hands (always wash thoroughly before handling your baby’s mouth)


how to clean newborn tongue
How to Clean a Newborn’s Tongue: Complete Guide for New Parents

Step-by-Step Guide to Clean Your Newborn’s Tongue

Cleaning your baby’s tongue is a straightforward process. Follow these steps to do it safely:

Step 1: Wash Your Hands

Before starting, wash your hands with soap and water. This prevents introducing any germs into your baby’s mouth.

Step 2: Prepare Your Supplies

Soak a piece of soft gauze or a clean washcloth in sterile, cooled water. Wring it out so it’s damp but not dripping.

Step 3: Hold Your Baby Comfortably

Sit in a comfortable position and hold your baby securely in your arms. You can also place them on a flat, safe surface if that feels easier.

Step 4: Open Your Baby’s Mouth

Gently use one finger to open your baby’s mouth. Ensure your touch is light and calming to avoid startling them.

Step 5: Clean the Tongue

Wrap the damp gauze or washcloth around your finger. Gently rub your baby’s tongue in circular motions, starting from the center and moving outward.

Step 6: Inspect for Thrush or Buildup

While cleaning, check for any thick, white patches that don’t come off. If you notice these, consult your pediatrician.

Alternative Tools for Baby Tongue Cleaning

If gauze or a washcloth feels cumbersome, try these alternatives:

  • Baby Finger Toothbrush: Specifically designed for infants, these are soft and gentle.
  • Silicone Tongue Cleaner: A flexible option that is easy to sterilize and use.

Common Mistakes to Avoid

Cleaning your newborn’s tongue isn’t hard, but there are a few pitfalls to steer clear of:

  • Skipping It Entirely: Neglecting oral hygiene can lead to thrush or bad breath.
  • Using Harsh Tools: Avoid adult toothbrushes or rough materials that can hurt your baby.
  • Forgetting to Check for Thrush: Regular cleaning is also an opportunity to spot early signs of infection.

How to Prevent Tongue Buildup

Prevention is easier than treatment! Here are some tips:

  • Clean After Every Feed: Wiping your baby’s mouth after feeding helps remove milk residue.
  • Hydration: Offer small amounts of water if your pediatrician approves, as this can rinse away residue.

What to Do If Your Baby Has Oral Thrush

If you suspect oral thrush, here’s what to do:

  1. Consult Your Pediatrician: Thrush often requires antifungal medication.
  2. Sterilize Feeding Tools: Bottles, pacifiers, and any feeding equipment should be thoroughly cleaned to prevent reinfection.
  3. Maintain Cleaning Routine: Keep cleaning your baby’s tongue to aid recovery.


how to clean newborn tongue

FAQs About Cleaning a Newborn’s Tongue

1. Is tongue cleaning painful for newborns?

Not at all! As long as you’re gentle and use soft materials, your baby should feel comfortable during the process.

2. How often should I clean my baby’s tongue?

Clean your baby’s tongue at least once a day, preferably after feeding.

3. Can I use toothpaste for my newborn?

No, toothpaste is not necessary or safe for newborns. Stick to water and gauze or baby-specific tools.

4. What if my baby resists?

Make it a positive experience! Try singing or talking soothingly to distract them.

5. How do I differentiate thrush from milk residue?

Milk residue wipes away easily, while thrush is thick, and stubborn, and may cause redness or discomfort.

Conclusion

Caring for your newborn’s oral hygiene might feel daunting, but with the right tools and techniques, it’s a simple process that makes a big difference. Regular tongue cleaning not only prevents issues like thrush but also sets the stage for healthy habits as your baby grows. Remember, your little one depends on you for their well-being—so a clean tongue is just one more way to keep them happy and healthy.

Introduction

Cutting your baby’s nails for the first time can feel like navigating uncharted waters. With their tiny, delicate fingers and surprising strength, this task might leave you feeling nervous. Fear not! With the right techniques, tools, and patience, you can easily master the art of trimming baby nails while keeping them safe and comfortable.

Why Baby Nail Care Is Crucial

Babies are born with soft, fast-growing nails. While they may look harmless, those tiny nails can be surprisingly sharp. Left untrimmed, they can cause scratches on your baby’s sensitive skin and even lead to infections. Regular nail trimming keeps your baby comfortable and reduces the risk of accidental injuries.

When Should You Start Trimming Baby Nails?

Parents often wonder when it’s safe to cut a newborn’s nails. The answer? As soon as needed! Most babies have nails that grow rapidly from birth. You might notice them getting long within the first week. If your baby’s nails are sharp or overgrown, it’s time to trim.


How to cut baby nails
How to Cut Baby Nails: A Complete Guide for New Parents

Tools You’ll Need for Baby Nail Care

1. Baby Nail Clippers or Scissors

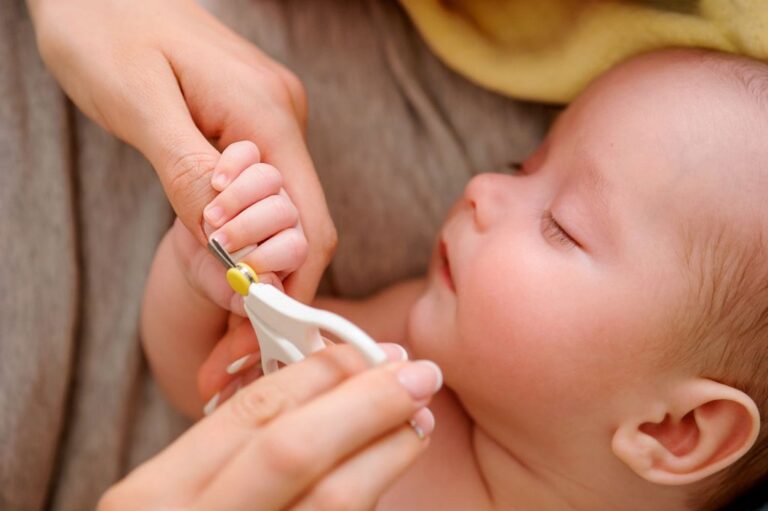
Specialized baby nail clippers and scissors are designed with rounded edges to minimize the risk of accidents. Always choose high-quality, baby-safe tools.

2. Nail Files

Emery boards or glass nail files are gentle alternatives for smoothing sharp edges. These are especially useful for newborns with very soft nails.

3. A Comfortable Seat and Good Lighting

Having clear visibility and a steady hand is crucial. A well-lit room and a comfortable position will make the task much easier.

Step-by-Step Guide to Cutting Baby Nails

1. Pick the Right Time

Timing is everything. The best time to cut baby nails is when your little one is calm or asleep. A sleeping baby is less likely to squirm, making the process safer and more manageable.

2. Wash Your Hands and Tools

Clean hands and sanitized tools are essential to prevent infections. Wipe the clippers or scissors with rubbing alcohol before use.

3. Hold Their Hand Firmly But Gently

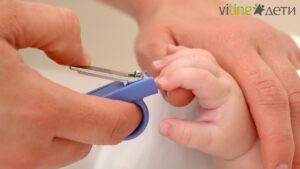
Hold your baby’s hand steady to prevent sudden movements. Use your fingers to gently push back the fingertip skin from the nail to avoid accidental nicks.

4. Follow the Natural Curve

Cut the nails following their natural curve, leaving no sharp edges. Avoid cutting them too short, as this can expose the nail bed and cause discomfort.

5. Smooth Out Rough Edges

After trimming, use a nail file to smooth out any sharp corners. This step ensures your baby’s nails are safe and prevents scratches.

Tips for a Stress-Free Nail Trimming Experience

1. Trim After a Bath

A warm bath softens the nails, making them easier to cut. Plus, your baby is likely to feel relaxed post-bath.

2. Use Distraction Techniques

If your baby is awake, engage them with a favorite toy or a soothing song to keep them calm and still.

3. Keep Sessions Short

Don’t rush to cut all ten nails in one go if your baby gets fussy. Break the task into smaller sessions if needed.

4. Enlist a Helper

If you’re nervous or your baby is particularly wiggly, ask another adult to help hold the baby’s hand steady.

What to Do If You Accidentally Nick the Skin

Despite your best efforts, accidents can happen. If you nick your baby’s skin:

  1. Stay Calm: Panicking can distress your baby.
  2. Apply Pressure: Use a clean cloth or tissue to apply gentle pressure until the bleeding stops.
  3. Clean the Area: Wash with warm water and mild soap to prevent infection.
  4. Avoid Bandages: Babies often put their hands in their mouths, so avoid using bandages that could pose a choking hazard.


How to cut baby nails
How to Cut Baby Nails: A Complete Guide for New Parents

Common Mistakes to Avoid

  1. Using Adult Tools: Never use adult nail clippers, as they’re too large and can cause injuries.
  2. Ignoring Sharp Edges: Always file nails after trimming to avoid scratches.
  3. Cutting Too Short: Leave a small white edge to avoid exposing the sensitive nail bed.

FAQs on Cutting Baby Nails

1. How Often Should I Cut My Baby’s Nails?

Babies’ nails grow rapidly and may need trimming 1-2 times a week. Toenails grow slower and can be trimmed every couple of weeks.

2. Can I Bite My Baby’s Nails Instead of Cutting Them?

Biting nails is unhygienic and can introduce bacteria, leading to infections. Always use proper tools.

3. Are Electric Baby Nail Trimmers Safe?

Yes, electric trimmers with safety features are safe and convenient for babies. They’re accommodating for smoothing nails without sharp edges.

4. Should I Cut My Baby’s Nails While They’re Awake or Asleep?

Cutting nails while your baby is asleep is generally easier and safer, as they’re less likely to squirm.

5. What if My Baby’s Nails Are Too Soft to Cut?

Use an emery board to file the nails gently instead of cutting them.

Conclusion

Caring for your baby’s nails doesn’t have to be daunting. With the right tools, timing, and techniques, you can keep your baby’s nails neat and safe without a fuss. Remember, practice makes perfect, so don’t hesitate to try again if the first attempt feels challenging. Nail care is just one small part of ensuring your baby’s overall health and comfort.

Introduction

Parenting comes with its fair share of challenges, and feeding your baby is one of the most critical aspects. The Baby Brezza Bottle Warmer has become a trusted companion for many parents, offering convenience and reliability. If you’re new to this device or want to optimize its use, this guide will provide all the insights you need.

1. What is a Baby Brezza Bottle Warmer?

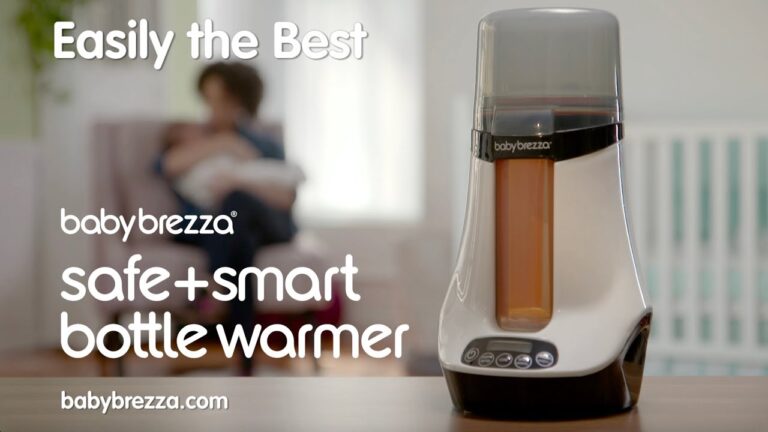
The Baby Brezza Bottle Warmer is a high-tech device designed to warm baby bottles, breast milk, and formula safely and efficiently. Its innovative features ensure the milk reaches the ideal temperature without losing nutrients, making feeding time easier for parents and comfortable for babies.

2. Why Choose the Baby Brezza Bottle Warmer?

The Baby Brezza Bottle Warmer stands out for its simplicity, speed, and precision. Here’s why many parents prefer it:

  • Ease of Use: The device features intuitive controls that make warming bottles hassle-free.
  • Versatility: It can heat bottles of varying sizes, as well as glass or plastic containers.
  • Nutrient Preservation: Its “Steady Warm” mode ensures breast milk is warmed evenly without compromising its nutrients.
  • Time-Saving: Faster than traditional water baths or microwaves, it’s ideal for busy parents.

3. Features of the Baby Brezza Bottle Warmer

To understand why this device is worth the investment, let’s explore its key features:

  1. Dual Warming Modes:
    • Steady Warm: Uses a warm water bath to preserve nutrients in breast milk.
    • Quick Warm: Employs steam for faster heating, suitable for formula or baby food.
  2. Digital Display:
    The clear, easy-to-read display simplifies operation.
  3. Compatibility:
    Works with most bottle brands and sizes.
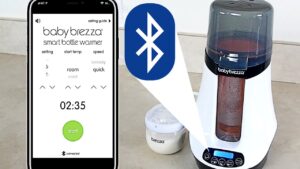
  4. Bluetooth Connectivity:
    With the Baby Brezza app, you can control the device remotely and receive alerts when warming is complete.

4. Step-by-Step Instructions on Using the Baby Brezza Bottle Warmer

Setting Up the Device

  1. Unbox the Baby Brezza Bottle Warmer and remove all packaging materials.
  2. Place the warmer on a flat, dry surface near an electrical outlet.
  3. Fill the water reservoir according to the instructions in the user manual. Ensure the water level is adequate but not overfilled.

Selecting the Mode

  1. Plug in the device and power it on using the button.
  2. Use the control panel to select either Steady Warm or Quick Warm based on your needs.

Heating Milk or Formula

  1. Place the baby bottle or container in the warming chamber.
  2. Adjust the settings for bottle size, content type (breast milk or formula), and preferred warming mode.
  3. Press start and wait for the warming cycle to complete.
  4. Once done, remove the bottle carefully and shake it to ensure even temperature distribution.

5. Safety Tips for Using a Bottle Warmer

  1. Avoid Overheating: Always check the milk’s temperature before feeding to prevent burns.
  2. Follow Manufacturer Instructions: Misuse can damage the device or lead to unsafe warming.
  3. Clean Regularly: Prevent bacteria buildup by cleaning the device after every use.
  4. Use Compatible Bottles: Ensure your bottles are compatible with the warmer to avoid leaks or improper heating.


How to Use Baby Brezza Bottle Warmer

6. How to Clean Your Baby Brezza Bottle Warmer

Cleaning your Baby Brezza Bottle Warmer is crucial for hygiene and performance. Here’s how:

  1. Daily Cleaning:
    • Unplug the device and let it cool down.
    • Empty the water reservoir and wipe the chamber with a soft cloth.
  2. Deep Cleaning (Weekly):
    • Use a mixture of equal parts vinegar and water to descale the reservoir.
    • Run a warming cycle without a bottle to remove mineral deposits.
    • Rinse thoroughly and wipe dry.
  3. Avoid Abrasive Materials:
    Stick to non-abrasive sponges or cloths to prevent scratching the surfaces.

7. Common Issues and Troubleshooting

  • The Warmer Doesn’t Start:
    Ensure it’s properly plugged in and that the water reservoir isn’t empty.
  • Uneven Heating:
    Check if the bottle is positioned correctly in the chamber.
  • Water Leakage:
    Avoid overfilling the reservoir and ensure all components are securely in place.

8. Benefits of Using a Baby Bottle Warmer

Still wondering if you need a bottle warmer? Here are the advantages:

  • Convenience: Eliminates guesswork in achieving the right temperature.
  • Nutrient Retention: Especially critical for breast milk.
  • Time Efficiency: Warm bottles in minutes, ideal for midnight feeds.
  • Safety: No risk of hot spots often caused by microwaves.

9. Alternatives to the Baby Brezza Bottle Warmer

While the Baby Brezza is excellent, you might also consider:

  • Philips Avent Fast Bottle Warmer
  • Dr. Brown’s Deluxe Bottle Warmer
  • Tommee Tippee Closer to Nature Warmer

Each of these offers unique features but may lack some of Baby Brezza’s advanced functionalities.

10. FAQs About Baby Bottle Warmers

1. Can I warm baby food jars in the Baby Brezza Bottle Warmer?

Yes, the warmer accommodates baby food jars as well as bottles.

2. How long does the warming process take?

The duration depends on the mode and bottle size but typically ranges from 3-10 minutes.

3. Is it safe to leave the warmer plugged in?

While it’s safe, unplugging the device when not in use is recommended for energy conservation.

4. How often should I describe the warmer?

Descaling is recommended every 1-2 weeks, especially if you use hard water.

5. Can I use distilled water in the reservoir?

Yes, using distilled water helps prevent mineral buildup and extends the device’s lifespan.

Introduction

Regarding baby care, every detail matters, including how often you should wash your baby’s hair. Whether you’re a first-time parent or looking to refine your routine, understanding the best practices for baby hair care can save you time and protect your baby’s sensitive scalp. In this guide, we’ll explore everything you need to know about baby hair washing, including frequency, product recommendations, and solutions to common concerns like cradle caps.

Why Is Baby Hair Washing Important?

1. Hygiene and Comfort

Keeping your baby’s hair and scalp clean is essential for hygiene and comfort. Newborns and toddlers sweat and can accumulate dirt, even if their hair seems thin or sparse. Washing helps remove any oil buildup, dead skin cells, and environmental impurities.

2. Preventing Scalp Issues

Regular washing can prevent or minimize common scalp issues like cradle cap (seborrheic dermatitis). However, overwashing can lead to dryness and irritation, making a balanced routine crucial.

3. Bonding Time

Bath time often doubles as a bonding experience. Gently washing your baby’s hair provides a chance for you to connect with them while establishing a comforting routine.

How Often Should You Wash Baby Hair?

The frequency of washing varies based on age, activity level, and scalp condition. Let’s break it down:

1. Newborns (0-3 Months)

  • Frequency: 1-2 times a week
    Newborns have delicate scalps and minimal oil production. Washing too often can strip their scalp of its natural oils, leading to dryness. Use a gentle baby shampoo specifically designed for newborns.

2. Infants (3-12 Months)

  • Frequency: 2-3 times a week
    As your baby becomes more active and starts eating solid foods, their hair might need washing more frequently to remove sweat, food particles, and dirt. Still, avoid daily washing unless absolutely necessary to prevent dryness.

3. Toddlers (1 Year and Older)

  • Frequency: 2-3 times a week or as needed
    Toddlers are more mobile and likely to get dirty during playtime. Wash their hair when it appears greasy, has visible dirt, or smells sweaty.


how often to wash baby hair

Signs That Your Baby’s Hair Needs Washing

While a general routine works for most babies, be on the lookout for these signs that indicate it’s time for a wash:

  • Visible dirt or food residue
  • Greasy or oily appearance
  • Noticeable odor
  • Signs of cradle cap buildup

Choosing the Right Products for Baby Hair Washing

1. Baby Shampoo

Opt for shampoos that are:

  • Tear-free
  • Hypoallergenic
  • Free of harsh chemicals like parabens and sulfates

2. Conditioner

For toddlers with longer or thicker hair, a light, baby-safe conditioner can help prevent tangles. Look for a product with natural ingredients like aloe vera or chamomile.

3. Tools

  • Soft brush or comb: Helps gently detangle and stimulate the scalp.
  • Hooded towel: Keeps your baby warm and comfortable after a wash.

How to Wash Baby Hair Step-by-Step

1. Prepare the Bath

  • Fill the tub with warm (not hot) water.
  • Have all your tools and products within arm’s reach.

2. Wet the Hair

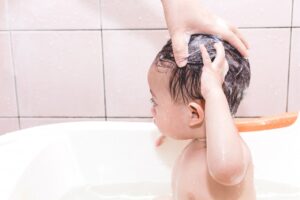
  • Use a cup or your hand to pour water gently over your baby’s head.
  • Avoid getting water in their eyes or ears.

3. Apply Shampoo

  • Pour a dime-sized amount of shampoo into your palm.
  • Massage it gently into their scalp, focusing on areas with visible dirt or cradle cap.

4. Rinse Thoroughly

  • Use clean, warm water to rinse away all shampoo.
  • Ensure no residue is left behind, as this can lead to irritation.

5. Dry the Hair

  • Pat the hair and scalp dry with a soft towel. Avoid rubbing, as this can irritate the skin.

Common Baby Hair Care Concerns

1. Cradle Cap

  • What It Is: Yellow, scaly patches on the scalp.
  • Solution: Use a soft brush to loosen flakes before washing. Apply a mild baby shampoo and rinse thoroughly.

2. Dry Scalp

  • What It Is: Flaky, itchy skin caused by overwashing or cold weather.
  • Solution: Limit hair washing to 1-2 times a week and use a moisturizer designed for babies.

3. Tangles in Toddler Hair

  • What It Is: Knots in long or curly hair.
  • Solution: Use a detangling spray or conditioner and a wide-tooth comb for gentle styling.

Tips for Maintaining a Healthy Baby Scalp

  1. Avoid Overwashing: Stick to the recommended frequency to prevent dryness.
  2. Keep Nails Trimmed: Babies may scratch their scalp, leading to irritation or infection.
  3. Protect from the Sun: Use a hat outdoors to shield your scalp from UV rays.


how often to wash baby hair

When to Consult a Pediatrician

If your baby experiences persistent scalp issues like redness, excessive flakes, or signs of infection, consult a pediatrician. They can recommend specialized treatments or identify underlying conditions.

FAQs About Washing Baby Hair

1. Can I use regular shampoo on my baby?

No, regular shampoos are too harsh for a baby’s sensitive scalp. Always use products specifically formulated for babies.

2. What if my baby hates hairwashing?

Try distracting them with toys or songs during bath time. Wash their hair last to minimize discomfort.

3. Should I wash my baby’s hair every day in hot weather?

Not necessarily. Use a damp cloth to wipe their scalp on non-washing days to keep it fresh.

4. Can I skip shampoo and use water only?

For newborns, this is often fine. However, older babies and toddlers may need shampoo to remove oils and dirt effectively.

5. How do I deal with thick or curly baby hair?

Use a baby-safe conditioner or detangler, and comb through gently with a wide-tooth comb to avoid breakage.

In conclusion, knowing how often to wash a baby’s hair depends on your child’s age, activity level, and specific scalp needs. With the right products and techniques, you can ensure their hair stays healthy and clean without irritation.

how to teach a baby to use a straw

Introduction

Teaching a baby to use a straw is a small yet significant milestone in their development. It not only encourages independent drinking but also supports oral motor skills, which are essential for speech development. But where do you start? In this guide, we’ll break down every step of teaching your baby to use a straw, ensuring it’s both a fun and rewarding experience for you and your little one.

Why Learning to Use a Straw is Important for Babies

Learning to use a straw offers numerous benefits:

  • Promotes Independence: Babies start drinking without relying on bottles or sippy cups.
  • Improves Oral Motor Skills: Strengthens muscles used for swallowing, chewing and even speech.
  • Reduces Dental Risks: Unlike bottles, straws encourage healthier drinking habits that may reduce prolonged exposure to sugary liquids.
  • Supports Transition to Regular Cups: Makes it easier to transition to open cups over time.

Straw drinking is a valuable skill that many parents aim to introduce around 6 to 9 months, but it’s never too late to start!

When Should You Start Teaching a Baby to Use a Straw?

Most babies are ready to start learning how to use a straw around 6 to 9 months. At this stage:

  • They are beginning to explore solid foods.
  • They develop better control over their tongue and mouth.
  • They show interest in how others drink.

However, readiness varies for each baby. Watch for cues like curiosity about your cup or successful sipping from a sippy cup as signs they’re ready.

Choosing the Right Straw and Cup for Training

Before you begin, you’ll need the right tools. Not all straws are baby-friendly, so selecting the appropriate one is key. Here’s what to consider:

Types of Straw Training Cups

  1. Soft Silicone Straws: Gentle on sensitive gums.
  2. Weighted Straws: Allow the liquid to flow no matter how the cup is tilted.
  3. Built-In Spill-Proof Cups: Ideal for minimizing mess during practice.

Recommended Products for Beginners

  • Munchkin Weighted Straw Trainer Cup
  • Honey Bear Straw Cup (used for therapeutic training)
  • Nuby Flex Straw Cup

Why These Work

These designs cater to baby-friendly ergonomics, offering soft, flexible straws that make sucking easier for little learners.

Step-by-Step Guide: How to Teach a Baby to Use a Straw

Teaching your baby to use a straw can be a breeze if approached systematically. Here’s a breakdown:

Step 1: Get Your Baby Familiar with a Straw

Start by introducing the straw. Let them hold it and chew on it to become accustomed to its texture and shape.

Step 2: Use a Straw Trainer or Pre-Filled Straw

Fill the straw with liquid and gently place your finger over the top to keep it sealed. Allow the liquid to drip into your baby’s mouth. This helps them associate the straw with drinking.

Step 3: Encourage Suction

Once they understand liquid comes from the straw, encourage them to suck. You can demonstrate the action by drinking from a straw yourself. Babies often mimic what they see.

Step 4: Transition to a Training Cup

Introduce a training cup with a built-in straw. These cups regulate the flow of liquid, making it easier for your baby to practice sucking without overwhelming them.

Step 5: Practice with Water or Milk

Start with water or breastmilk/formula, as these are familiar flavors. Avoid introducing juices initially to ensure your baby doesn’t develop a preference for sugary drinks.

Common Challenges and How to Overcome Them

Teaching a baby to use a straw isn’t always straightforward. Here are some common issues parents face and solutions:

1: Baby Doesn’t Understand Sucking

  • Solution: Use a honey bear straw cup or pre-filled straw to guide the liquid to their mouth, encouraging them to try sucking.

2: Baby Chews the Straw

  • Solution: Redirect their focus by showing them how you sip from a straw and encouraging imitation.

3: Refusal to Try

  • Solution: Make the experience playful by adding a favorite drink or using fun, colorful straws to spark interest.

Tips to Make Straw Training Easier

  • Be Patient: Babies learn at their own pace, so don’t rush the process.
  • Make it Fun: Use silly sounds, cheers, or songs to keep your baby engaged.
  • Offer Praise: Celebrate small victories to motivate continued effort.
  • Practice Regularly: Incorporate straw drinking during mealtime or snack time.

Signs Your Baby is Ready for Independent Straw Use

Watch for these milestones to gauge your baby’s progress:

  • Successfully sucking liquid through the straw without assistance.
  • Reduced spilling or dribbling during drinking.
  • Ability to transition from assisted to independent straw use.

Once these are achieved, your baby is well on their way to mastering this skill!

FAQs: Common Concerns About Straw Training

Q1: Can my baby skip sippy cups and go straight to straws?

Yes! Straw cups are often a better choice than sippy cups as they promote healthier oral development.

Q2: What if my baby doesn’t like the straw?

Experiment with different straw types or introduce a favorite drink to spark interest.

Q3: Are there safety concerns with straw cups?

Ensure the straw and cup are BPA-free and designed for babies. Always supervise drinking to avoid choking hazards.

Q4: How long does it take for a baby to learn to use a straw?

It varies. Some babies pick it up within days, while others may take a few weeks of consistent practice.

Q5: Can I use juice for straw training?

It’s better to start with water or milk to avoid forming a preference for sugary drinks.

Conclusion

Teaching your baby to use a straw is an exciting step that fosters independence and supports developmental milestones. By choosing the right tools, practicing patience, and using playful techniques, you’ll make the journey enjoyable for both you and your baby. Remember, every baby learns at their own pace, so celebrate each small success along the way.

Introduction

Organizing baby clothes might feel like a never-ending task, especially with how quickly babies grow and the constant flow of adorable outfits gifted by friends and family. Don’t worry—we’ve got you covered! This step-by-step guide will help you set up an efficient system to keep everything neat, accessible, and stress-free. Learn how to organize baby clothes with these practical tips and creative ideas.

Why Organizing Baby Clothes Is Important

Time-Saving Benefits

Picture this: you’re running late, and your baby spits up all over their onesie. An organized system means you can grab a clean outfit in seconds instead of rummaging through piles of clothes.

Extending the Lifespan of Baby Clothes

Proper organization prevents clothes from getting damaged or forgotten. That adorable romper your baby wore once? It won’t sit at the bottom of a drawer, outgrown before it’s used again.

Getting Started: Assess Your Space

Evaluate Closet and Drawer Space

Take a look at what storage space you already have. Are the closets too cluttered? Are the drawers overflowing? Knowing your starting point will help you decide what additional storage tools you might need.

Consider Additional Storage Solutions

If your space is limited, think outside the box. Shelving units, under-crib storage bins, or even a portable wardrobe can make a world of difference.


how to organize baby clothes

Declutter First: Out with the Old

Sorting Clothes by Size

Babies grow fast, and those newborn onesies won’t fit forever. Sort clothes into piles: currently fit, too small, and will fit later.

Donating or Storing Old Clothes

Donate gently used clothes to charities or pass them on to friends. For sentimental pieces, store them in vacuum-sealed bags to save space.

Sorting Baby Clothes

By Size and Age

Organize clothes by size (e.g., 0-3 months, 3-6 months). This makes it easy to grab what you need without digging through everything.

By Type of Clothing

Separate onesies, sleepers, outfits, and accessories. Use drawer dividers to keep items in their designated sections.

Choosing the Right Storage System

Drawer Organizers

These handy tools keep everything in its place. Use small compartments for socks, bibs, and tiny mittens.

Hanging Dividers

Label dividers by size or season to create order in the closet. They’re perfect for keeping outfits ready to go.

Bins and Baskets

Use labeled bins for items like blankets or outgrown clothes. Stackable options maximize vertical space.

Label Everything

Why Labels Are a Game-Changer

Labels save time and keep your system consistent, especially if other caregivers are helping with baby duties.

Creative Labeling Ideas

Use colorful tags, chalkboard labels, or even photos for a fun and functional touch.

Seasonal Organization Tips

Rotating Clothes for Different Seasons

Keep only the current season’s clothes accessible. Store off-season items in labeled bins.

Storing Seasonal Clothes Safely

Use airtight containers to prevent dust and moisture from ruining clothes.

How to Fold Baby Clothes Efficiently

Folding Techniques for Maximum Space

Try rolling clothes or the KonMari folding method to make the most of your drawer space.

Folding Tips for Small Items

Tiny socks and mittens can get lost easily. Use mesh bags or small organizers to keep them together.

Using Vertical Space

Hanging Storage Solutions

Install hooks or hanging organizers to store frequently used items like bibs or hats.

Over-the-Door Organizers

These are great for holding shoes, accessories, or even diapers.

Maintaining an Organized System

Weekly Checks and Adjustments

Spend a few minutes each week tidying up and removing clothes that no longer fit.

Involving Other Family Members

Teach your partner or babysitter your system so they can help maintain it.


how to organize baby clothes

Mistakes to Avoid When Organizing Baby Clothes

  • Overstuffing drawers and bins.
  • Forgetting to label storage containers.
  • Keeping clothes you’ll never use.

Eco-Friendly Tips for Storing Clothes

  • Opt for reusable storage bags.
  • Donate or upcycle outgrown clothes.
  • Use natural moth repellents like lavender sachets.

Organizing Baby Accessories

Storing Socks, Mittens, and Hats

Use small compartments or hanging pockets to keep these easily lost items organized.

Managing Shoes and Booties

Designate a bin or basket for baby shoes to prevent them from scattering everywhere.

Conclusion

Organizing baby clothes doesn’t have to be a chore. With a bit of planning and the right tools, you can create a system that works for you and grows with your baby. Take it one step at a time, and soon you’ll have an organized nursery that saves time and reduces stress.

FAQs

1. How often should I reorganize baby clothes?
Revisit your system every month or two, as babies multiply and sizes change.

2. What’s the best way to store outgrown clothes?
Use vacuum-sealed bags or plastic bins to keep them protected and labeled.

3. How can I prevent baby clothes from getting wrinkled?
Folding neatly and not overloading storage spaces helps keep clothes wrinkle-free.

4. Should I wash clothes before storing them?
Yes, ensure they’re clean and dehydrated to prevent mildew or stains.

5. Can I reuse my organizing system for future children?
Absolutely! A versatile, well-organized system can save you time with your next baby.